

Ahhh, the scrap fabric bin. What to do with it all?
I try to use as many reusable products as I can. I have always hated the way cotton balls feel so I was happy to find a reusable alternative in fabric cotton rounds.
If you don’t have time to make your own face scrubbies, we have some handmade ones in our shop that are ready to ship.
Cotton rounds are a great way to use up fabric scraps and have many, many uses. Some of the things we use them for are: makeup removal, applying astringent or alcohol to the skin, nail polish removal, applying diaper rash cream, cleaning little noses, drying off baby’s bottom after using a wipe. And the list goes on.
These little guys are super simple to make and are a great beginner’s project when learning to sew. You’ll need two pieces of scrap fabric for each round. I prefer flannel cotton for most uses, but almost any soft cotton will work. Polyester fleece is excellent at removing eye makeup so I like to put that on one side for my makeup removing scrubbies. Please note that if you use these for removing nail polish, they are definitely going to get stained and stay that way. But they’re so cheap to make, it doesn’t really matter! Use the ugly ones for nail polish, keep the pretty ones for other uses.

The Tools
What you’ll need:
Scrap Fabric – (flannel, fleece, jersey, hemp, etc)
Scissors
Pins
Sewing Machine
Thread
Compass to draw a circle or a round object to trace one
You should be able to finish off a set in 15 minutes or less. It is entirely normal to get some fraying around the edges after the first couple of washes. Just clip any loose strings.
Come back and show off what you made! If you want to bulk up your scrubbies stash, or would rather buy them than make them, we have some available for purchase here: Mabe, With Love on Etsy.
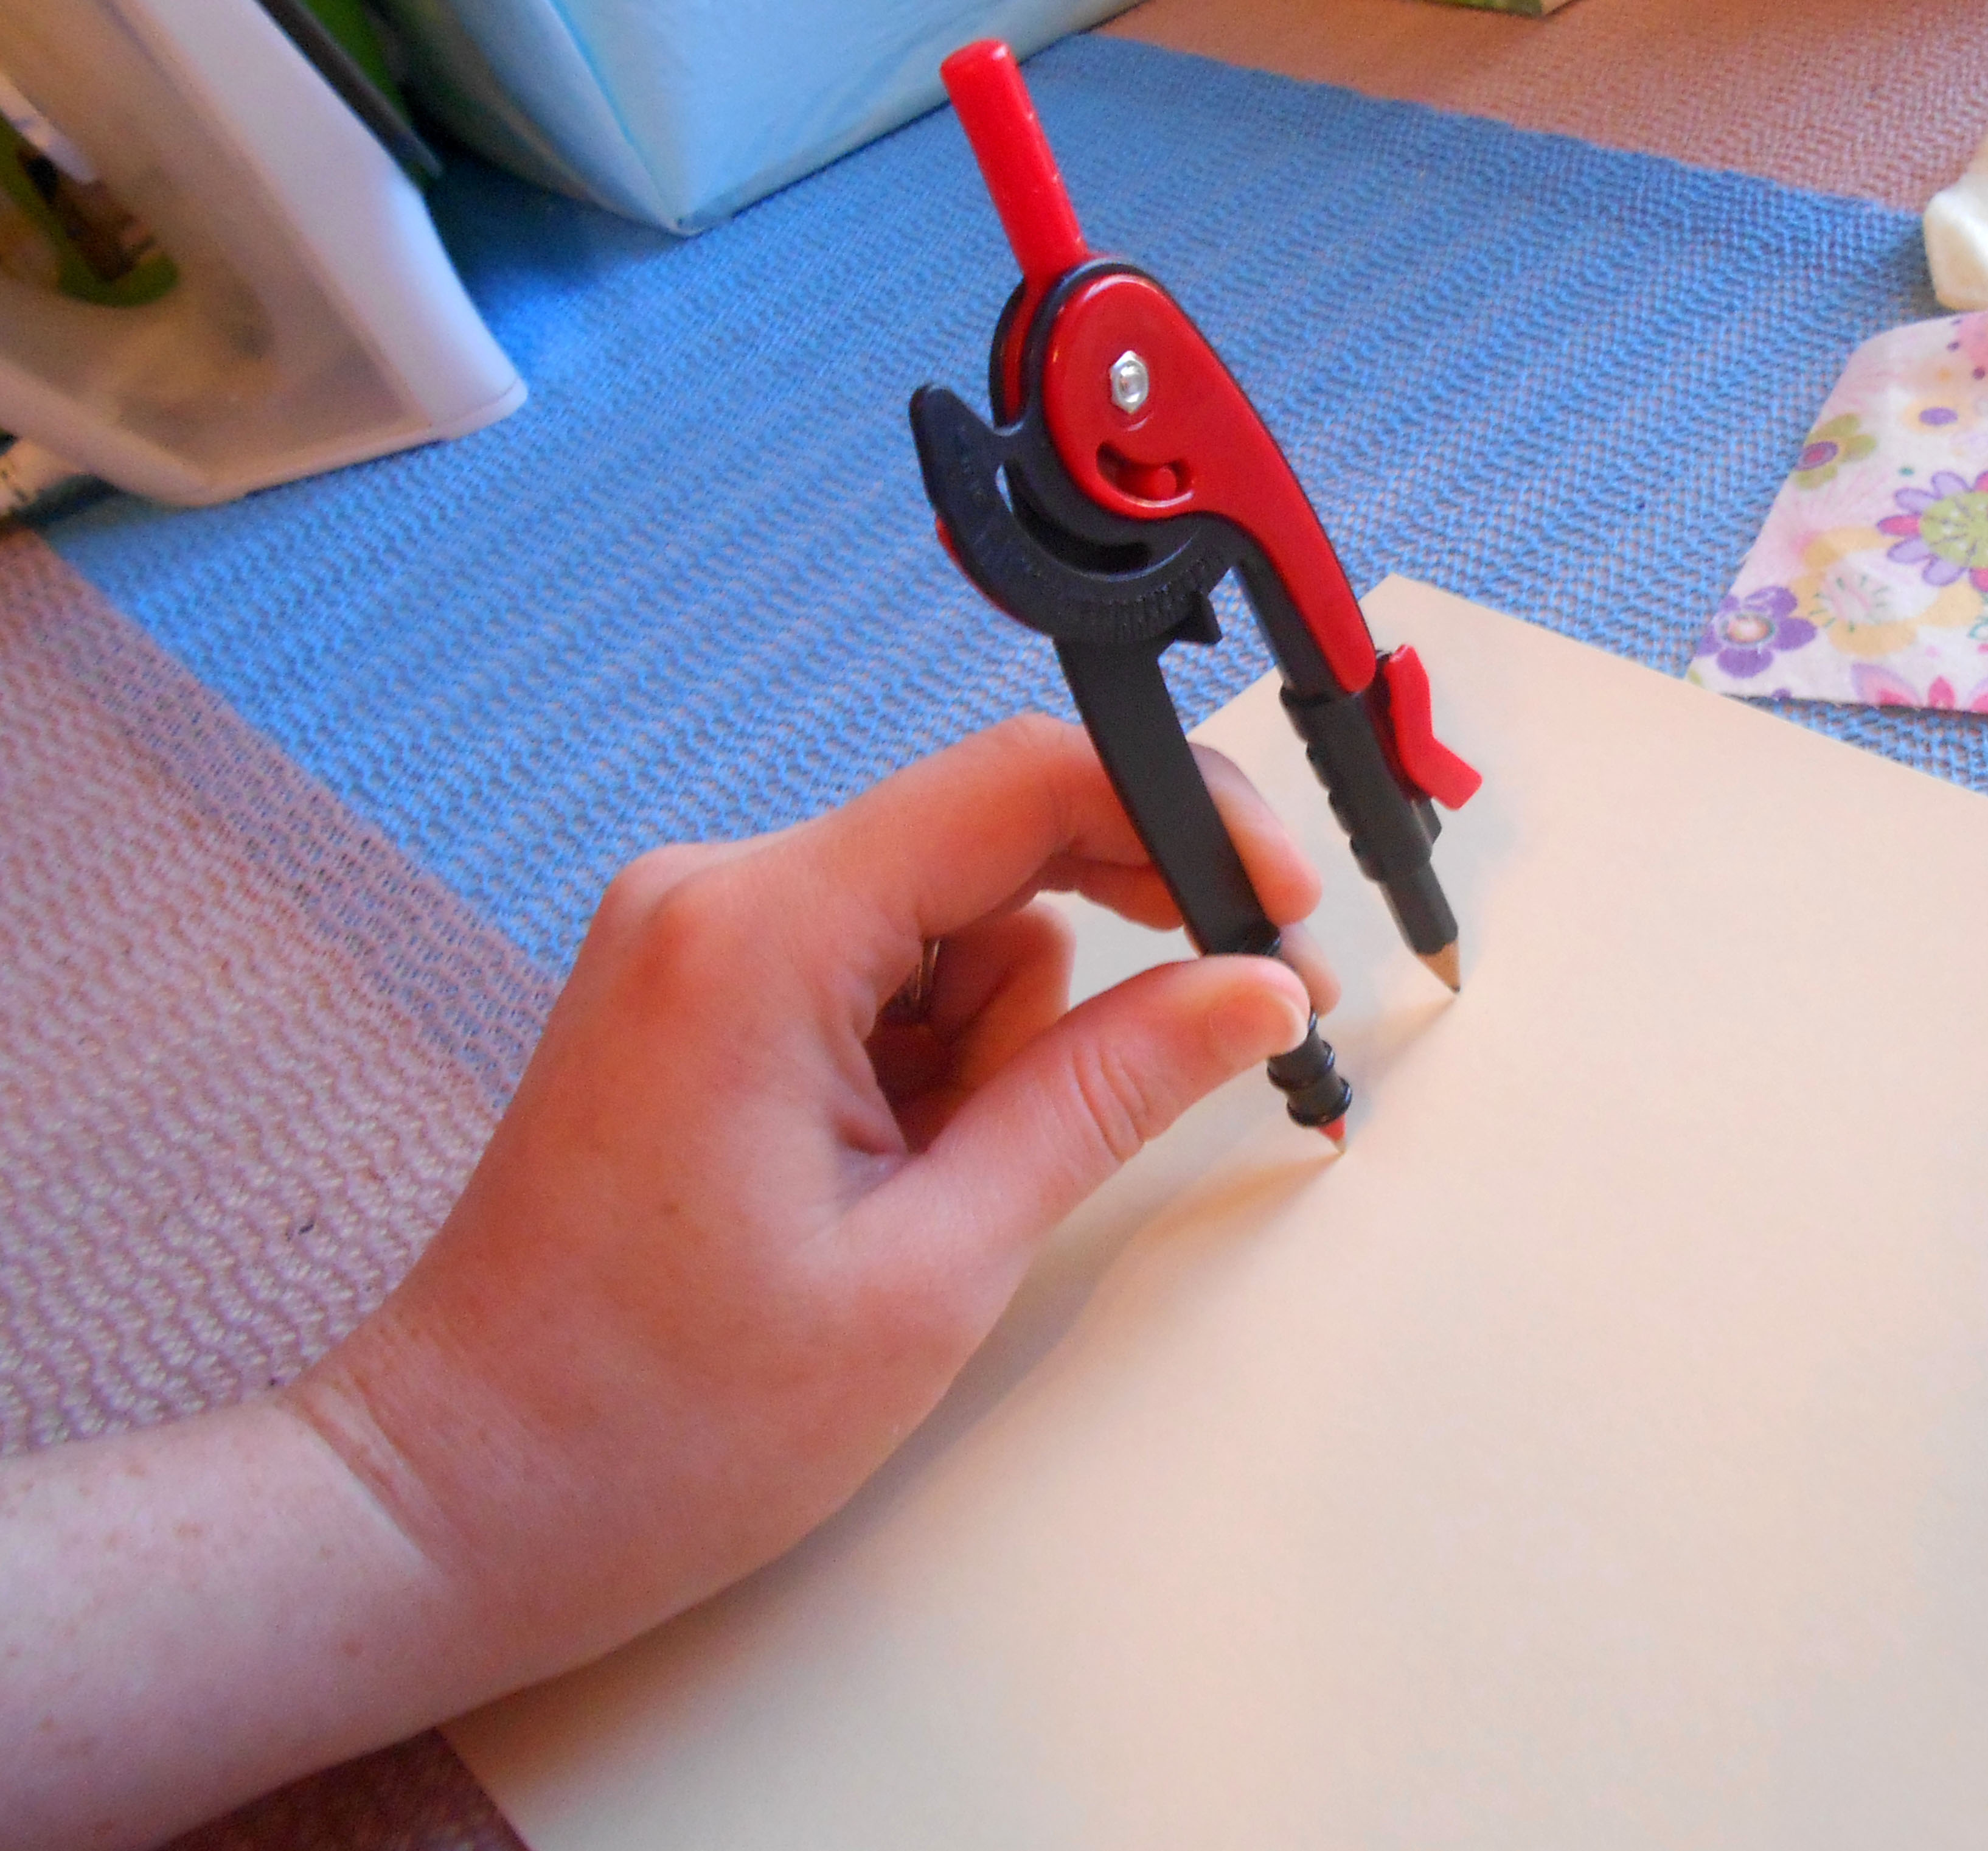
Using your compass, draw a circle that is about 3″. To get a 3″ circle, set your compass on 1.5″. If you want a larger or smaller scrubbie, just divide that number in half and that’s what you’ll set your compass on. You can find a compass at the Dollar Tree, Walmart, or any office supply store.

If you don’t have a compass, no worries. Just find a cup or bowl with an opening roughly the size of the scrubbie you’d like and trace it.

Place your two pieces of scrap fabric with wrong sides touching other. You want the right sides of both fabrics facing out.
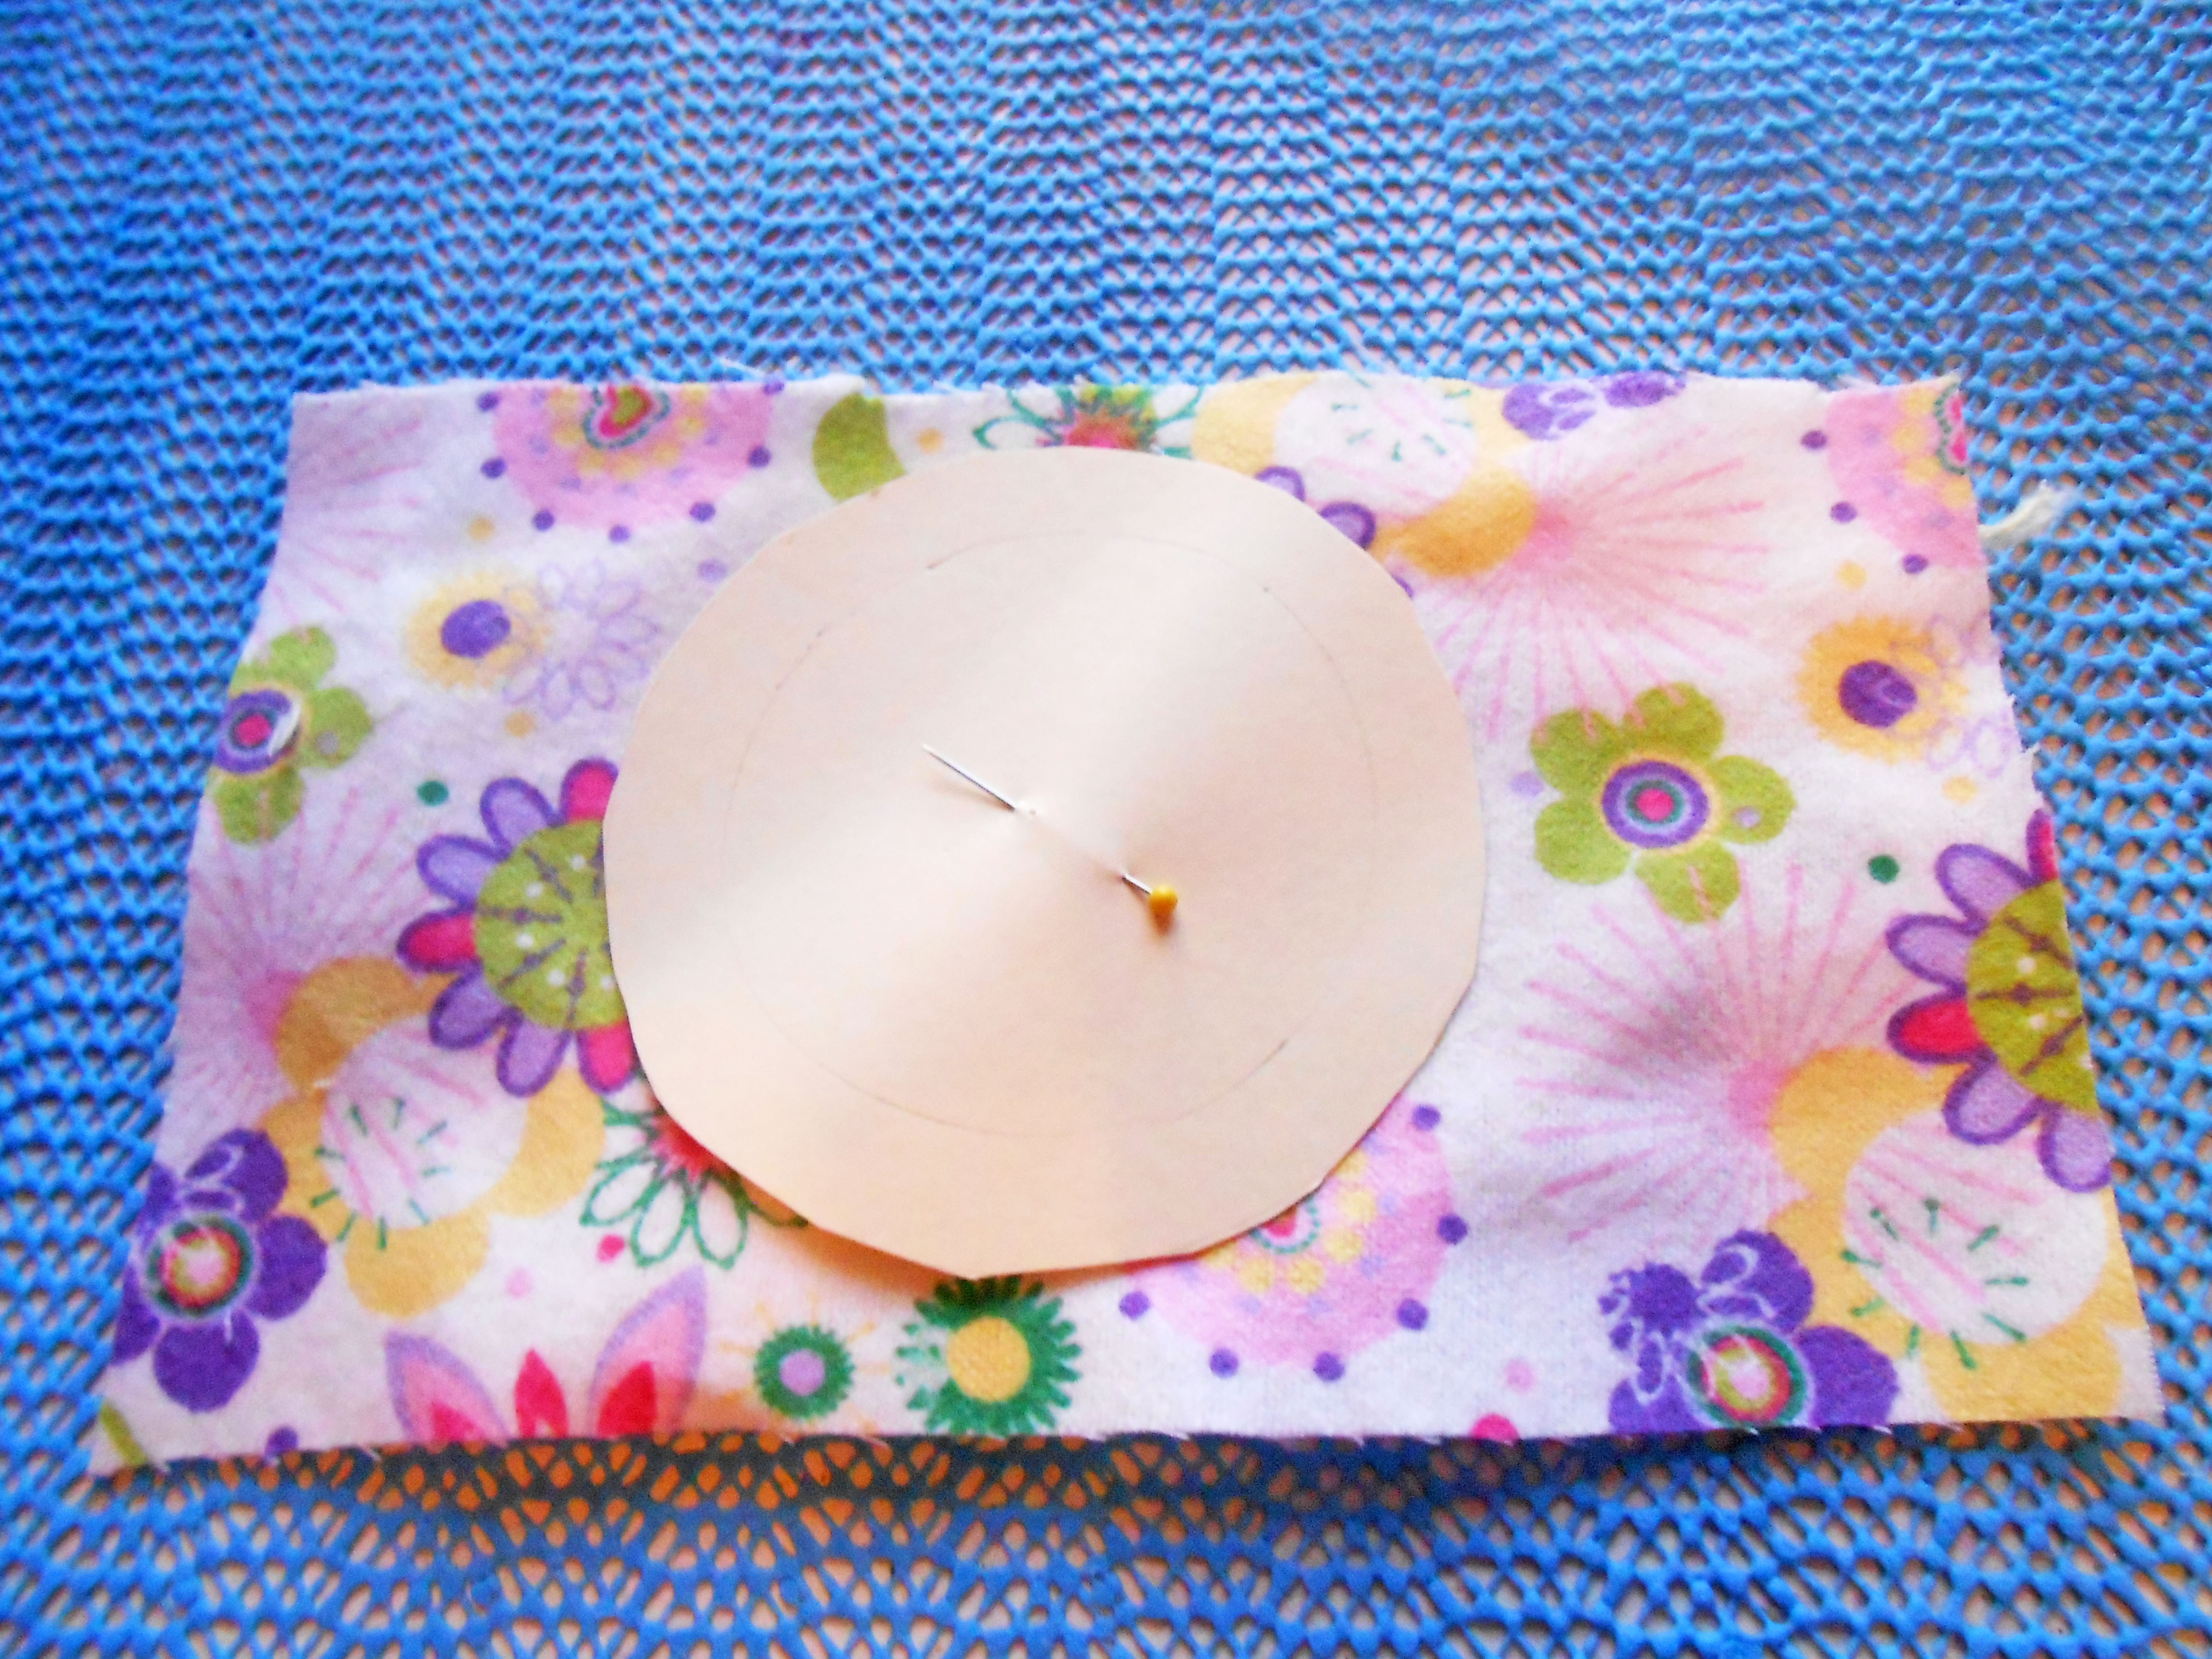
Pin your circle to your stacked pieces of fabric.

Cut around your paper circle so that you get a round fabric stack.
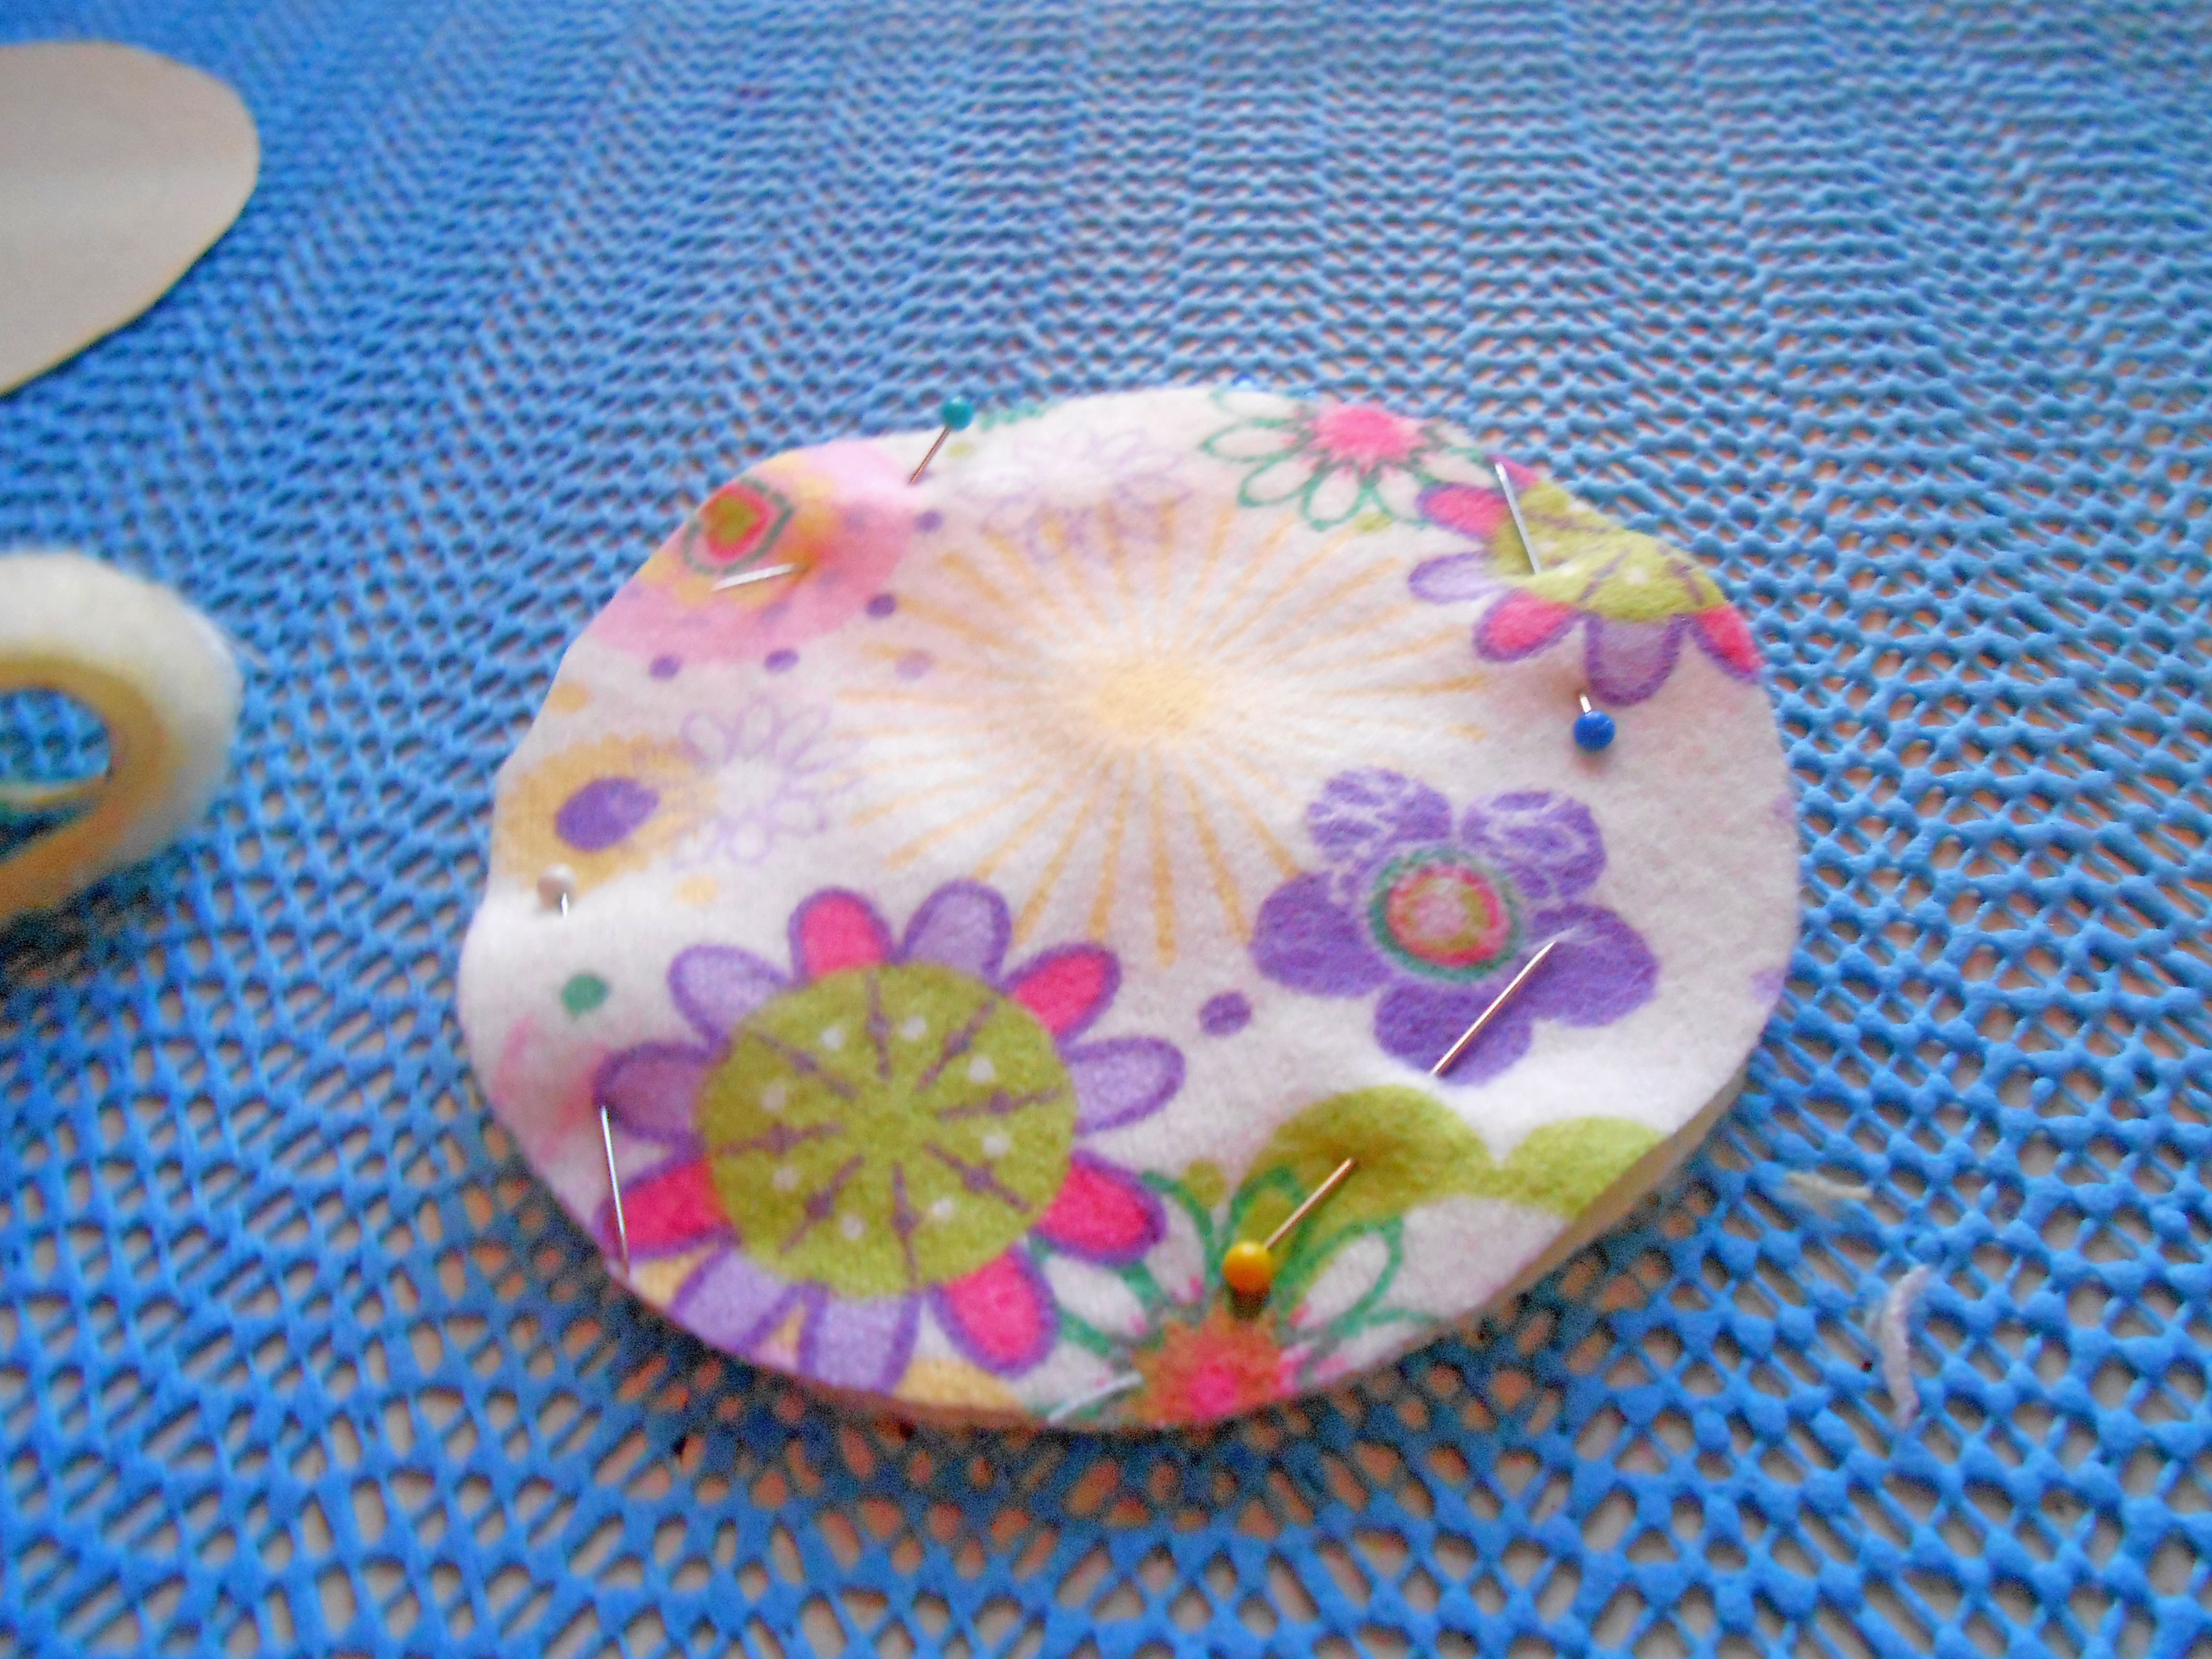
Take out the pin and set your paper circle aside. Pin around the outer edge of your fabric so that the two pieces stay together. If you’re not a pinner, just put one pin in the middle so the fabric doesn’t slide.

Choose your thread. You can do a matching color or a contrasting color. You could even do one color to match the bottom in the bobbin and a color to match the top for your spool. Variegated thread is also a pretty option.
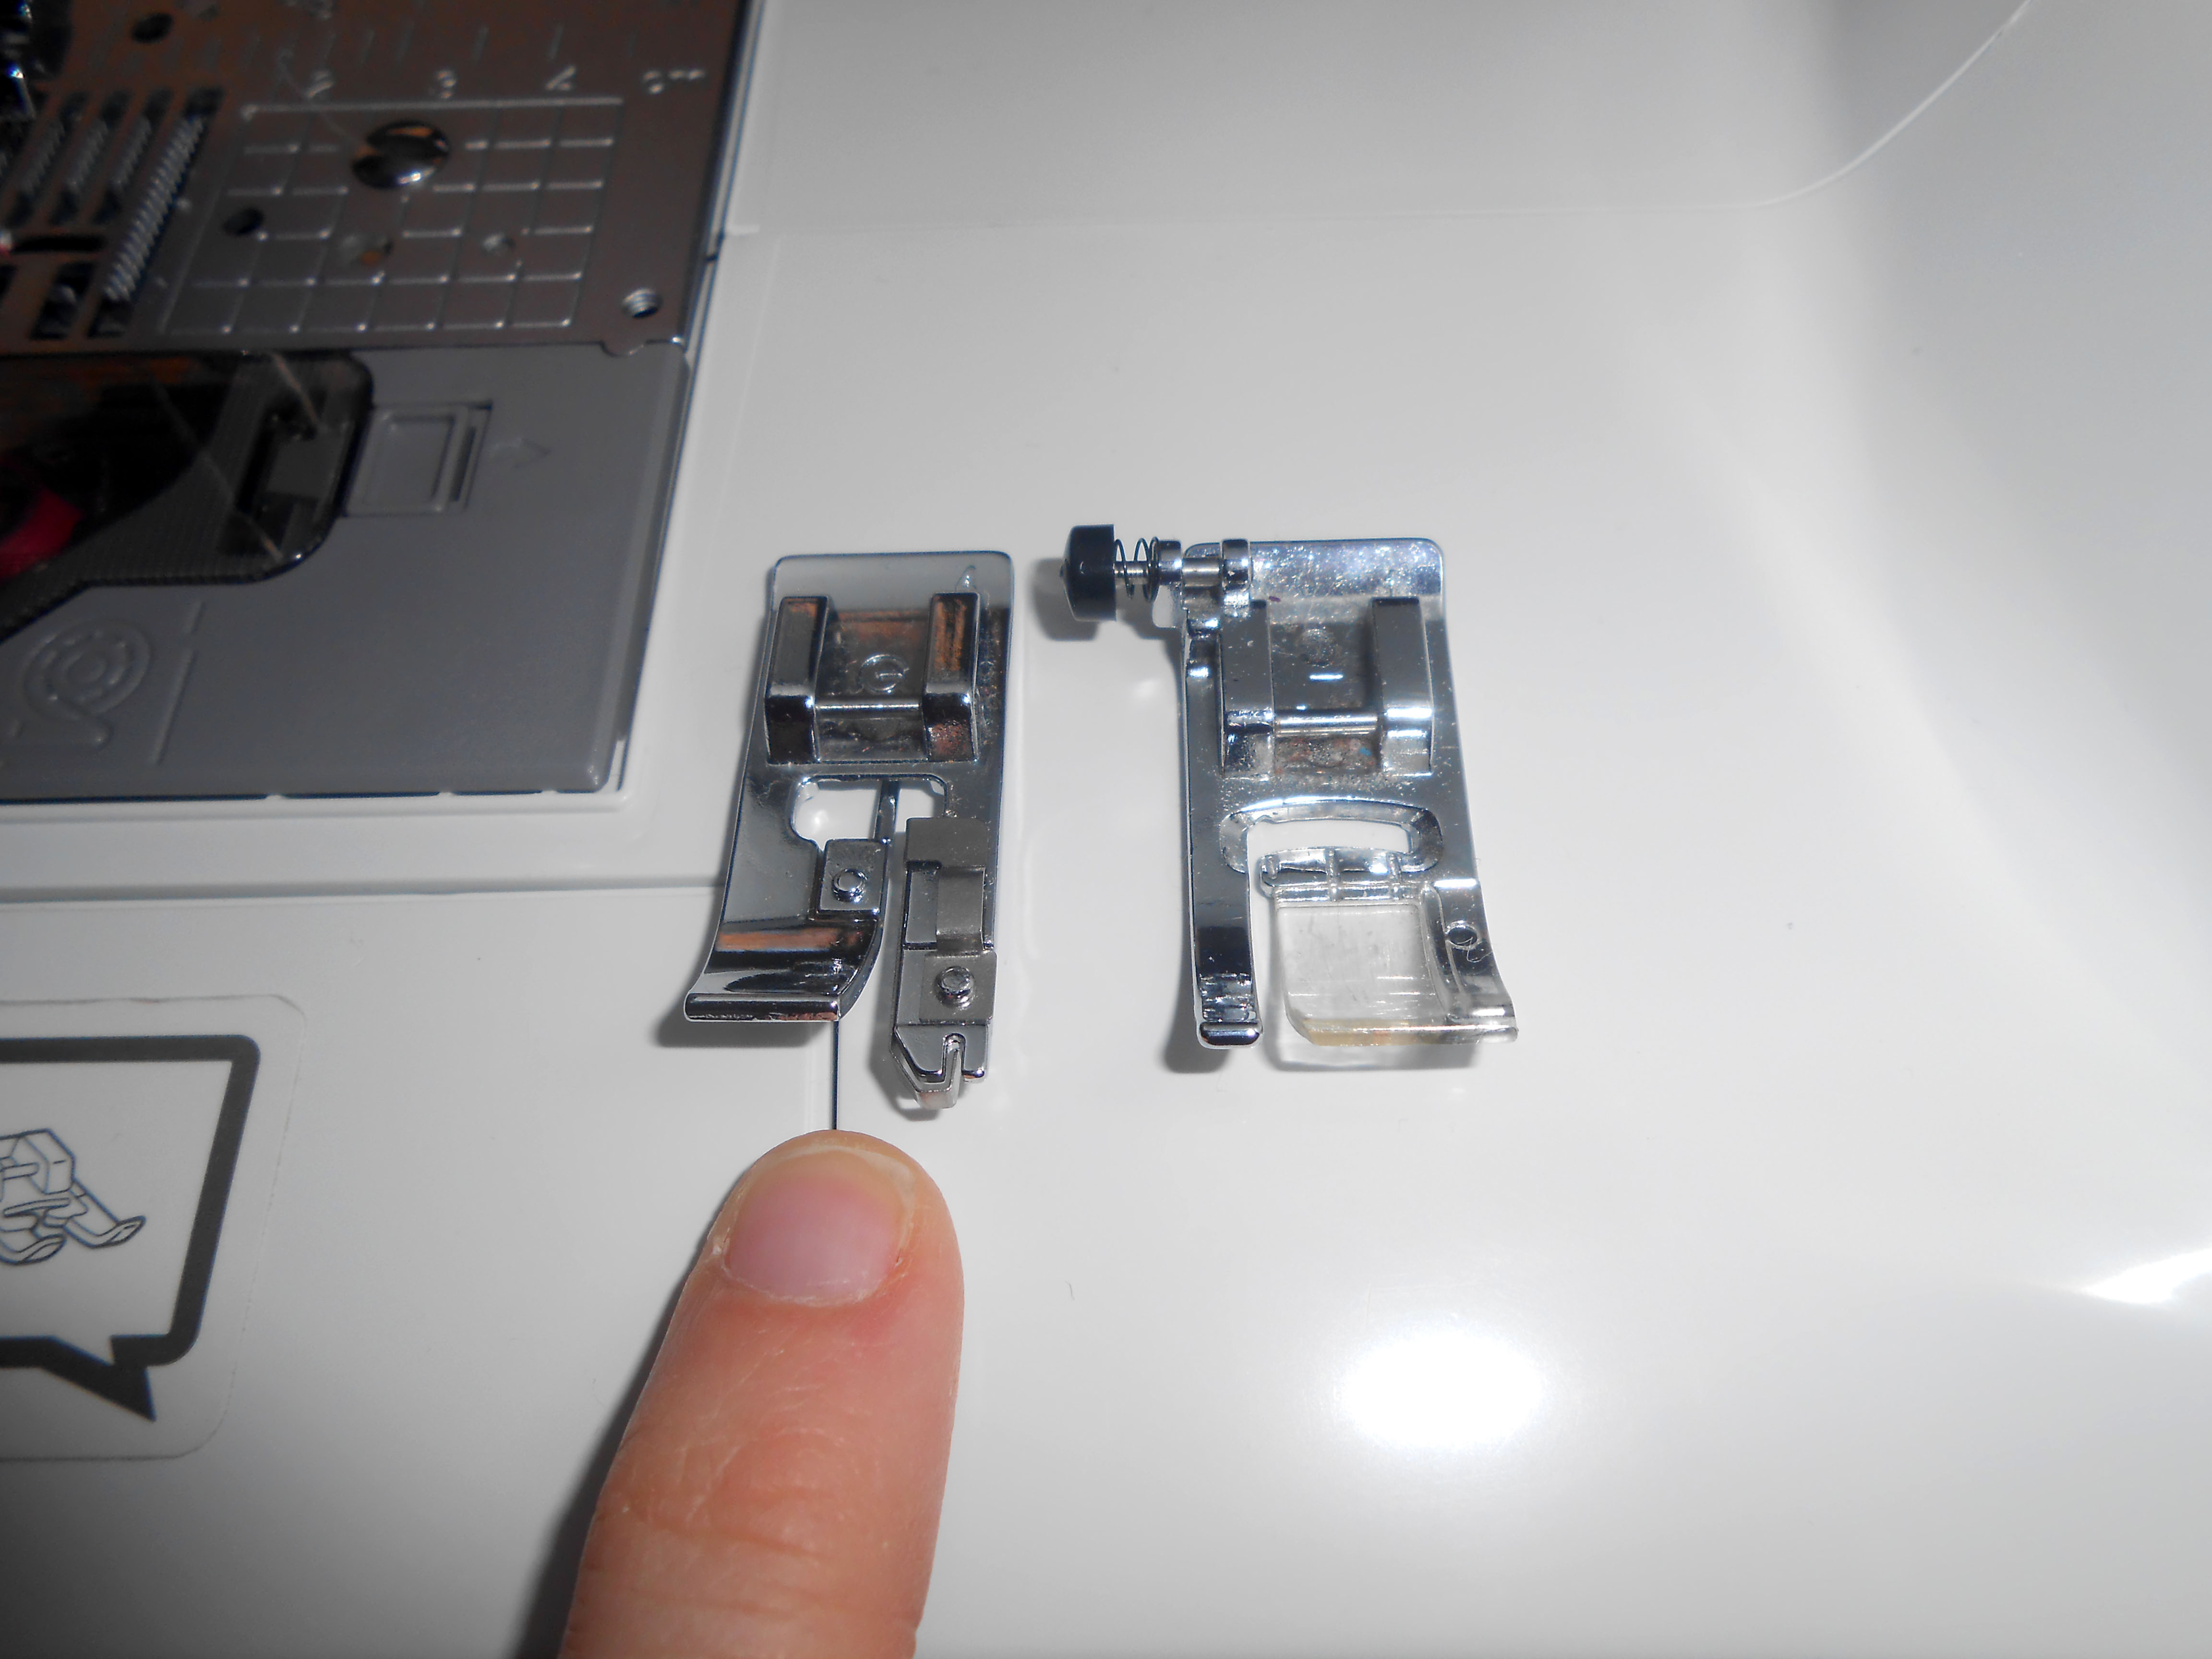
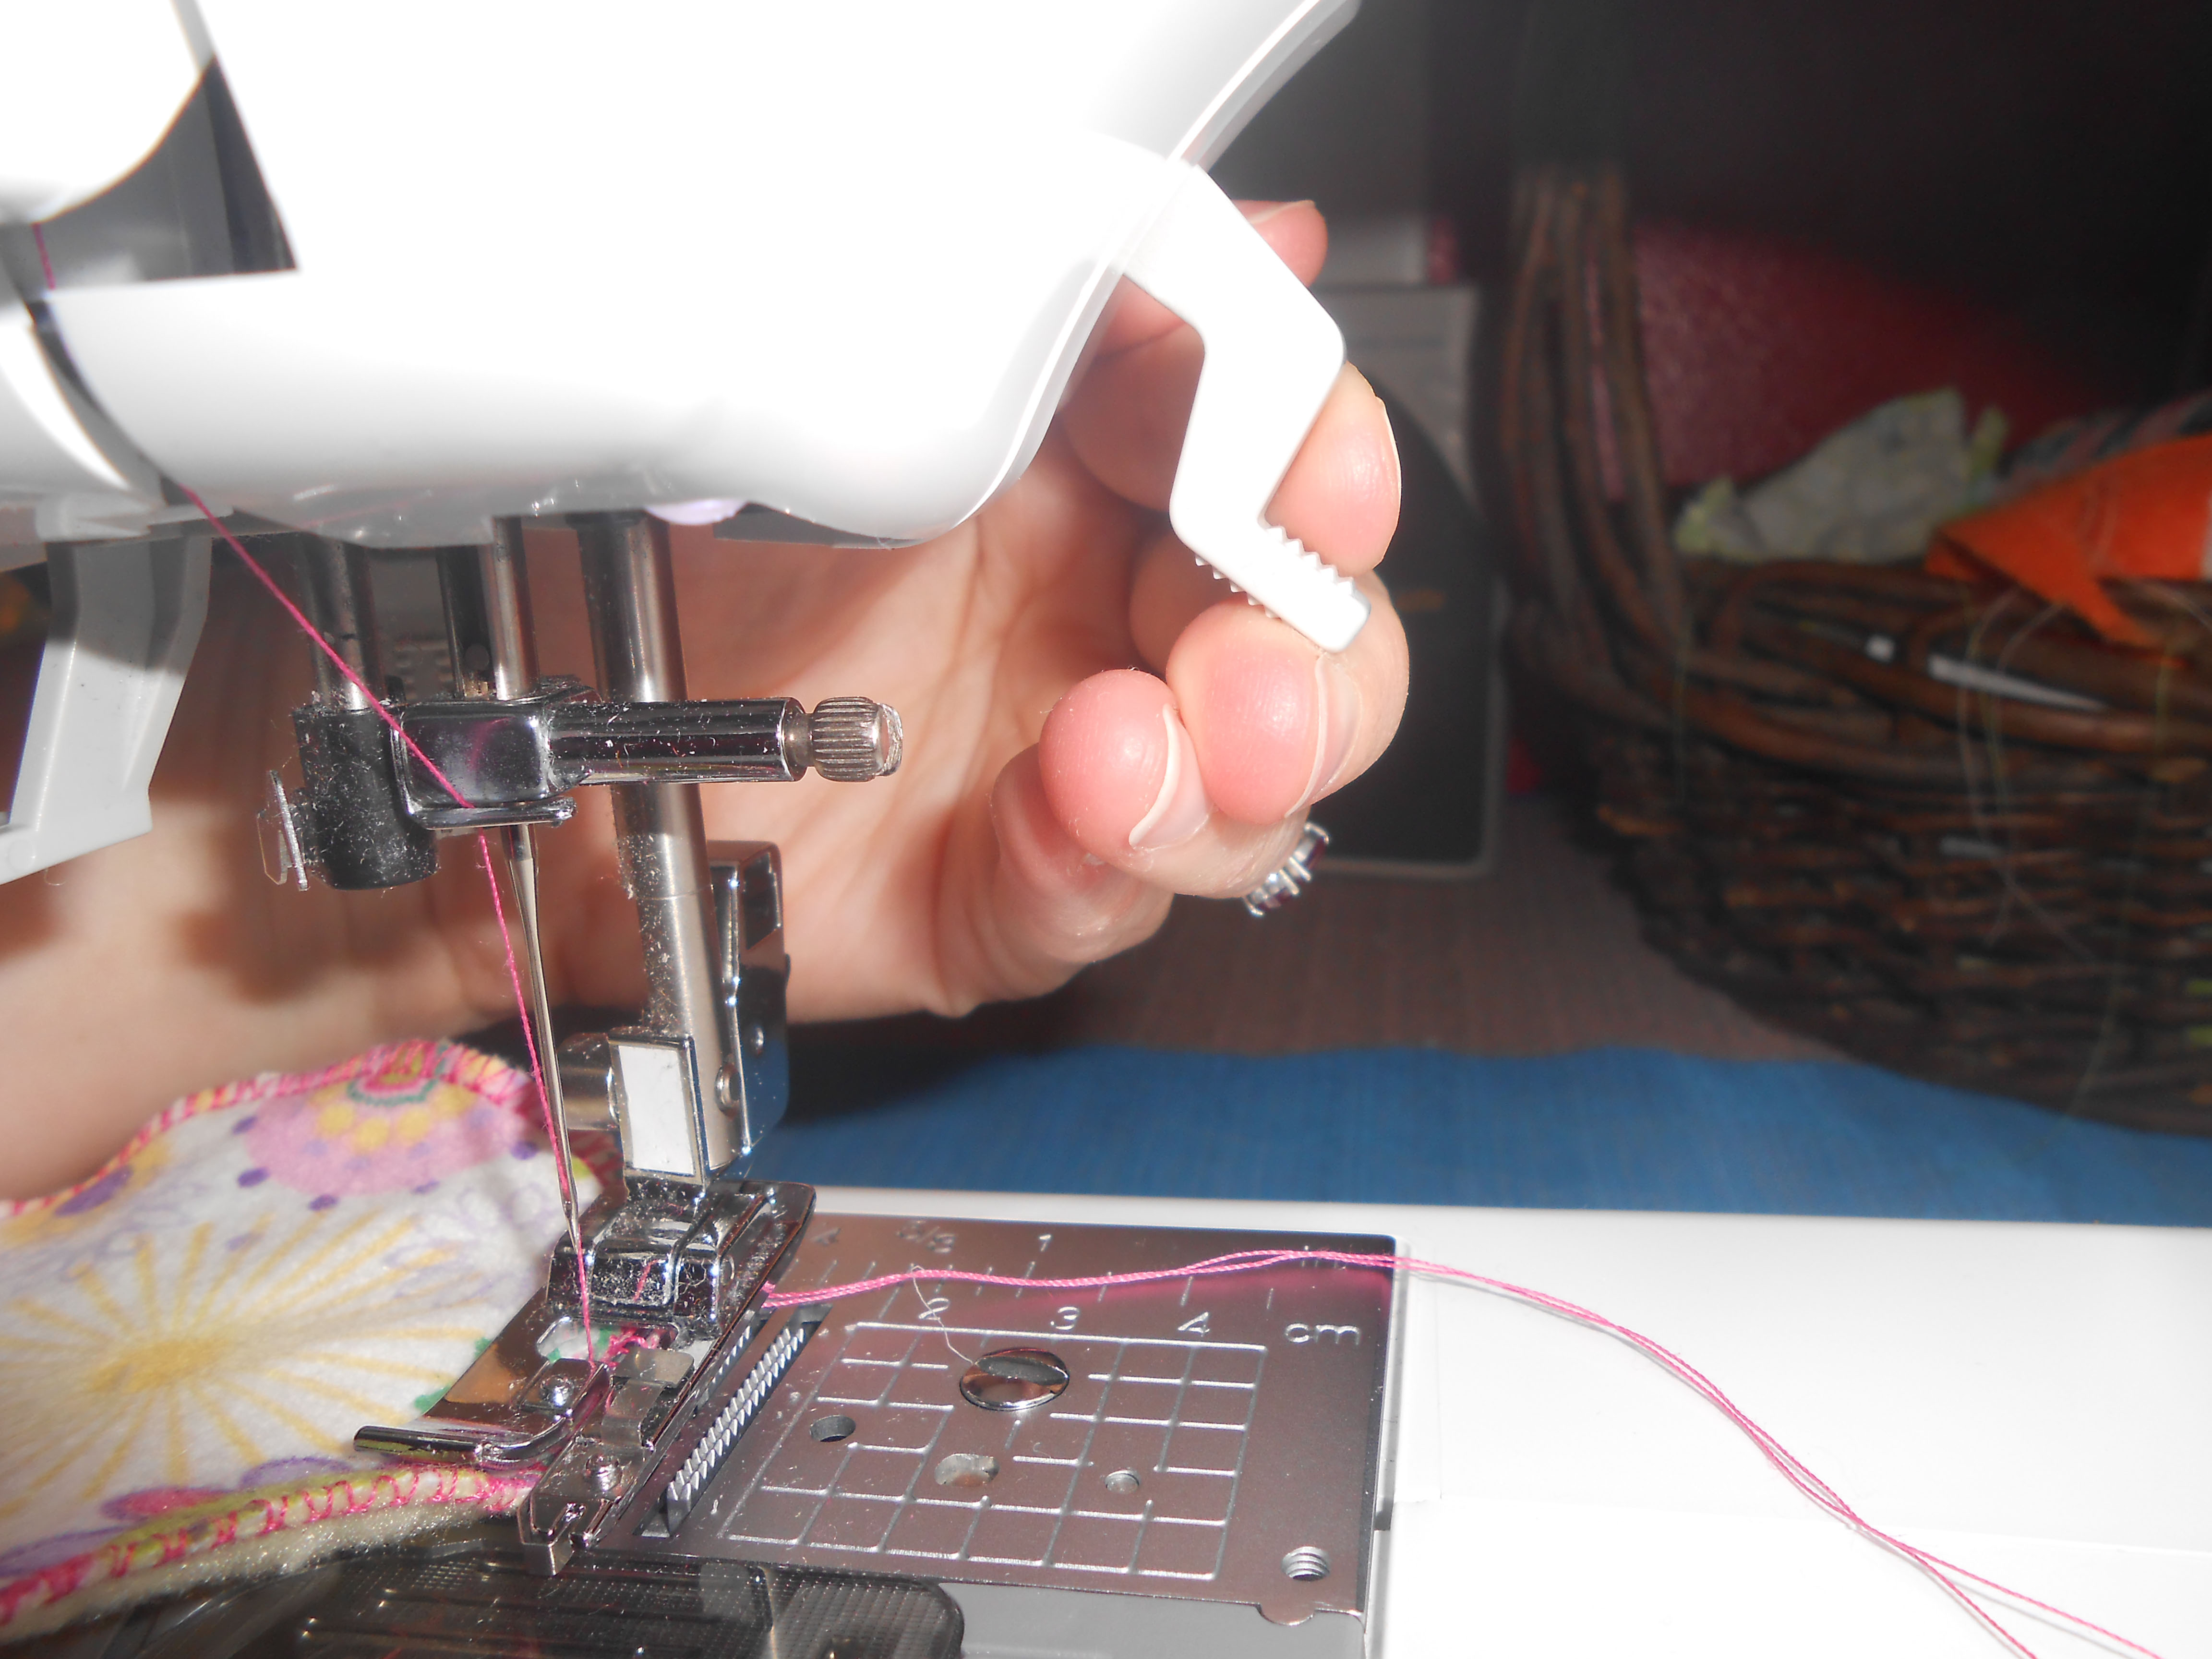
If you have an overcast foot for your machine, use it. The overcast foot is on the left hand side in the photo. If you don’t have one a regular foot will work fine.

If your machine has mock serge stitches (overcast stitches), use one of those. I prefer stitch 7 on my machine, but stitch 8 works well too.
If your machine does not have a mock serge stitch, choose the regular zig zag stitch (stitch 4 in the picture).

No matter what stitch you choose, you’ll want it to be a tight stitch to keep the edges from fraying too much. I typically set the length to 1-1.5 and the width to 3.5-4. Experiment on a scrap piece of fabric to see what you prefer.
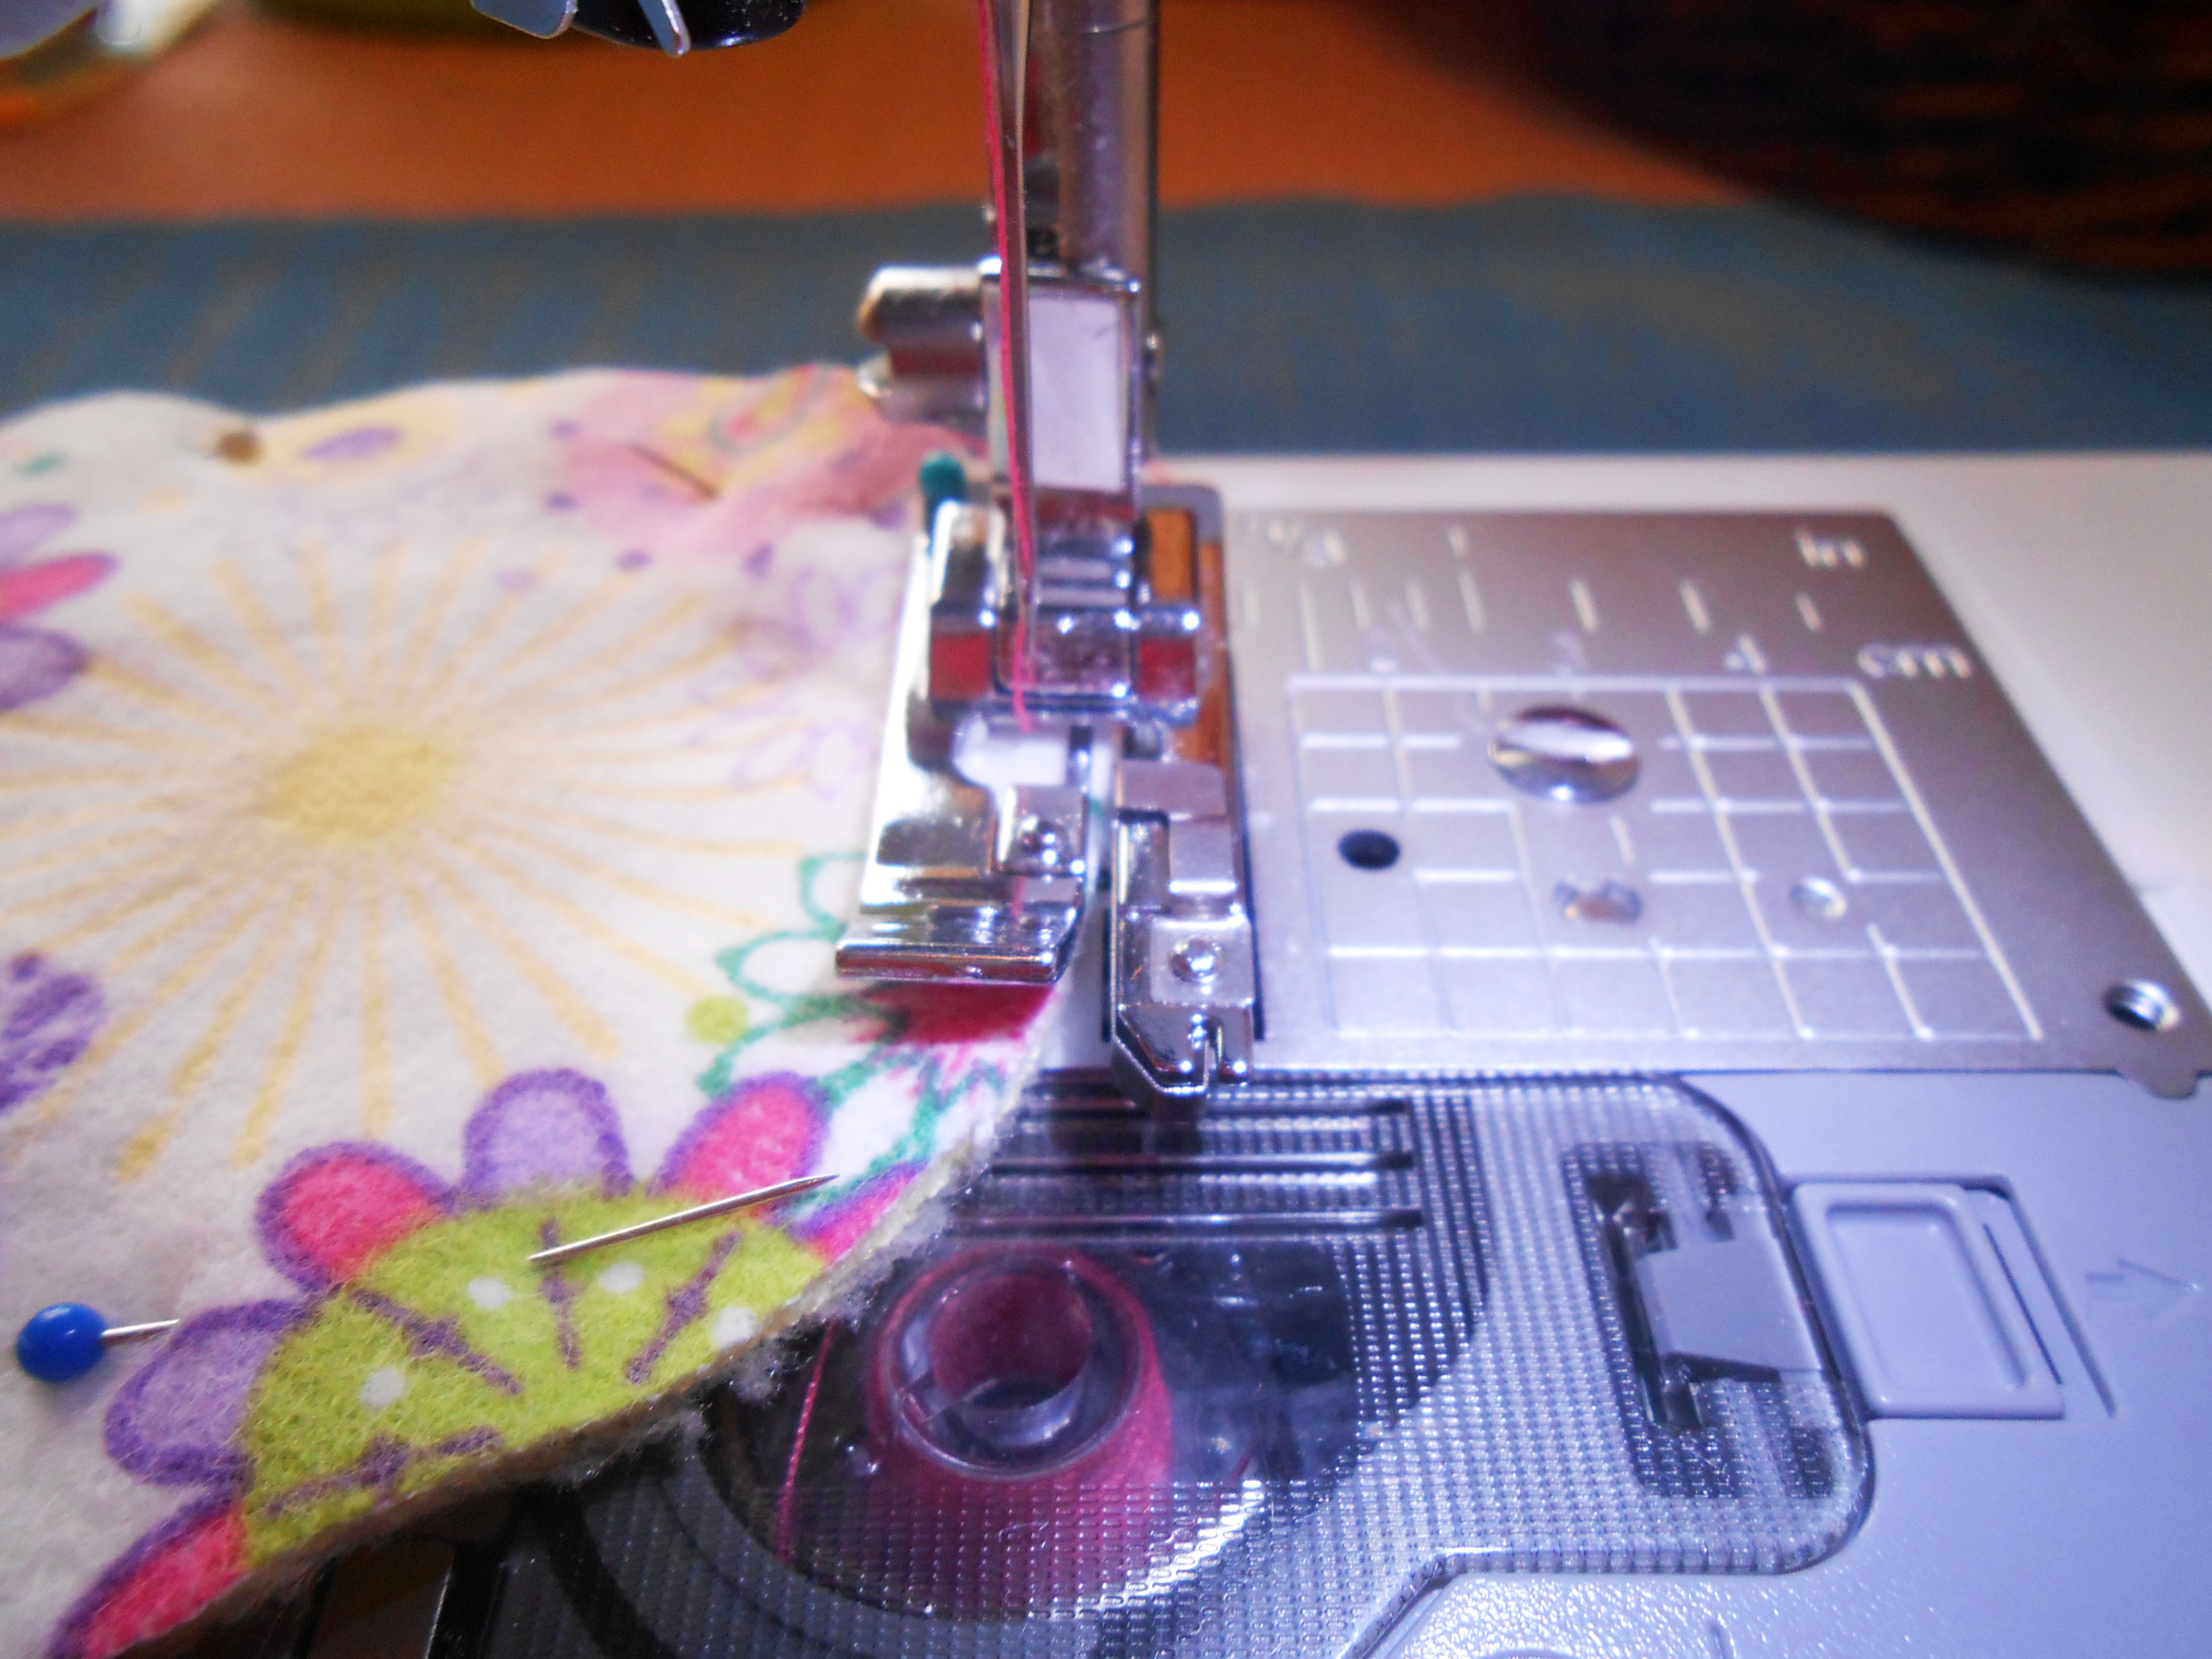
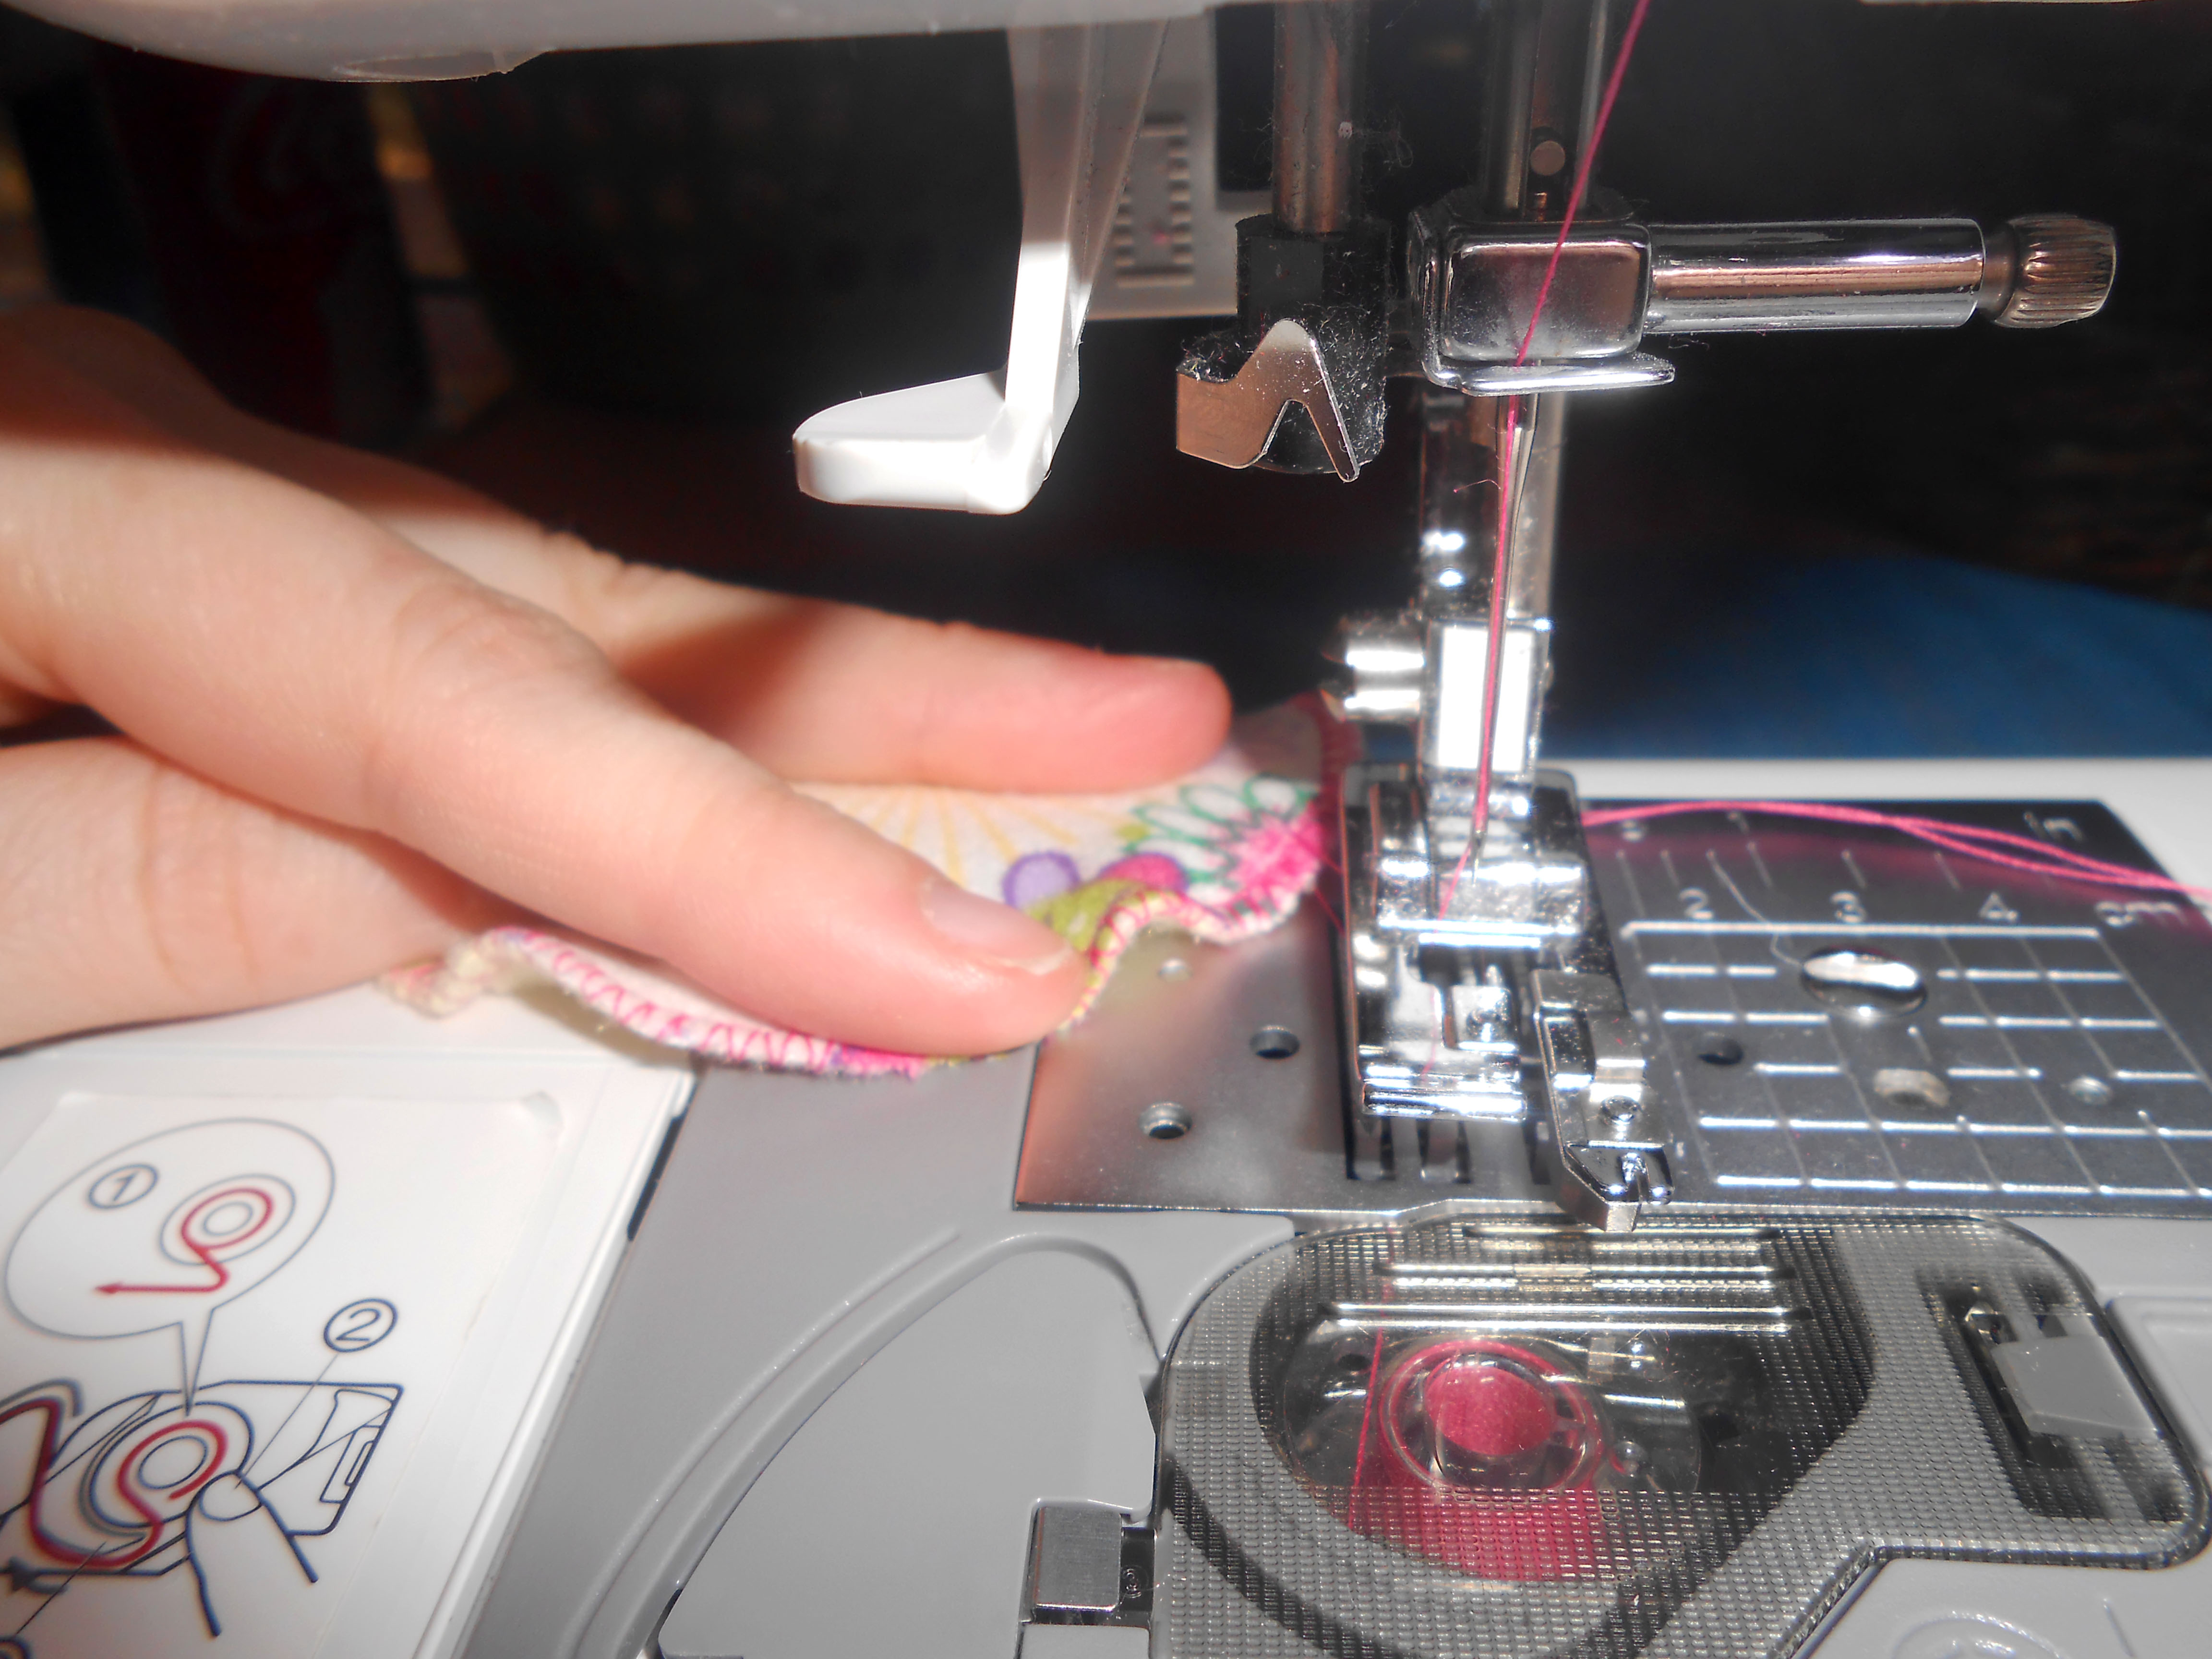
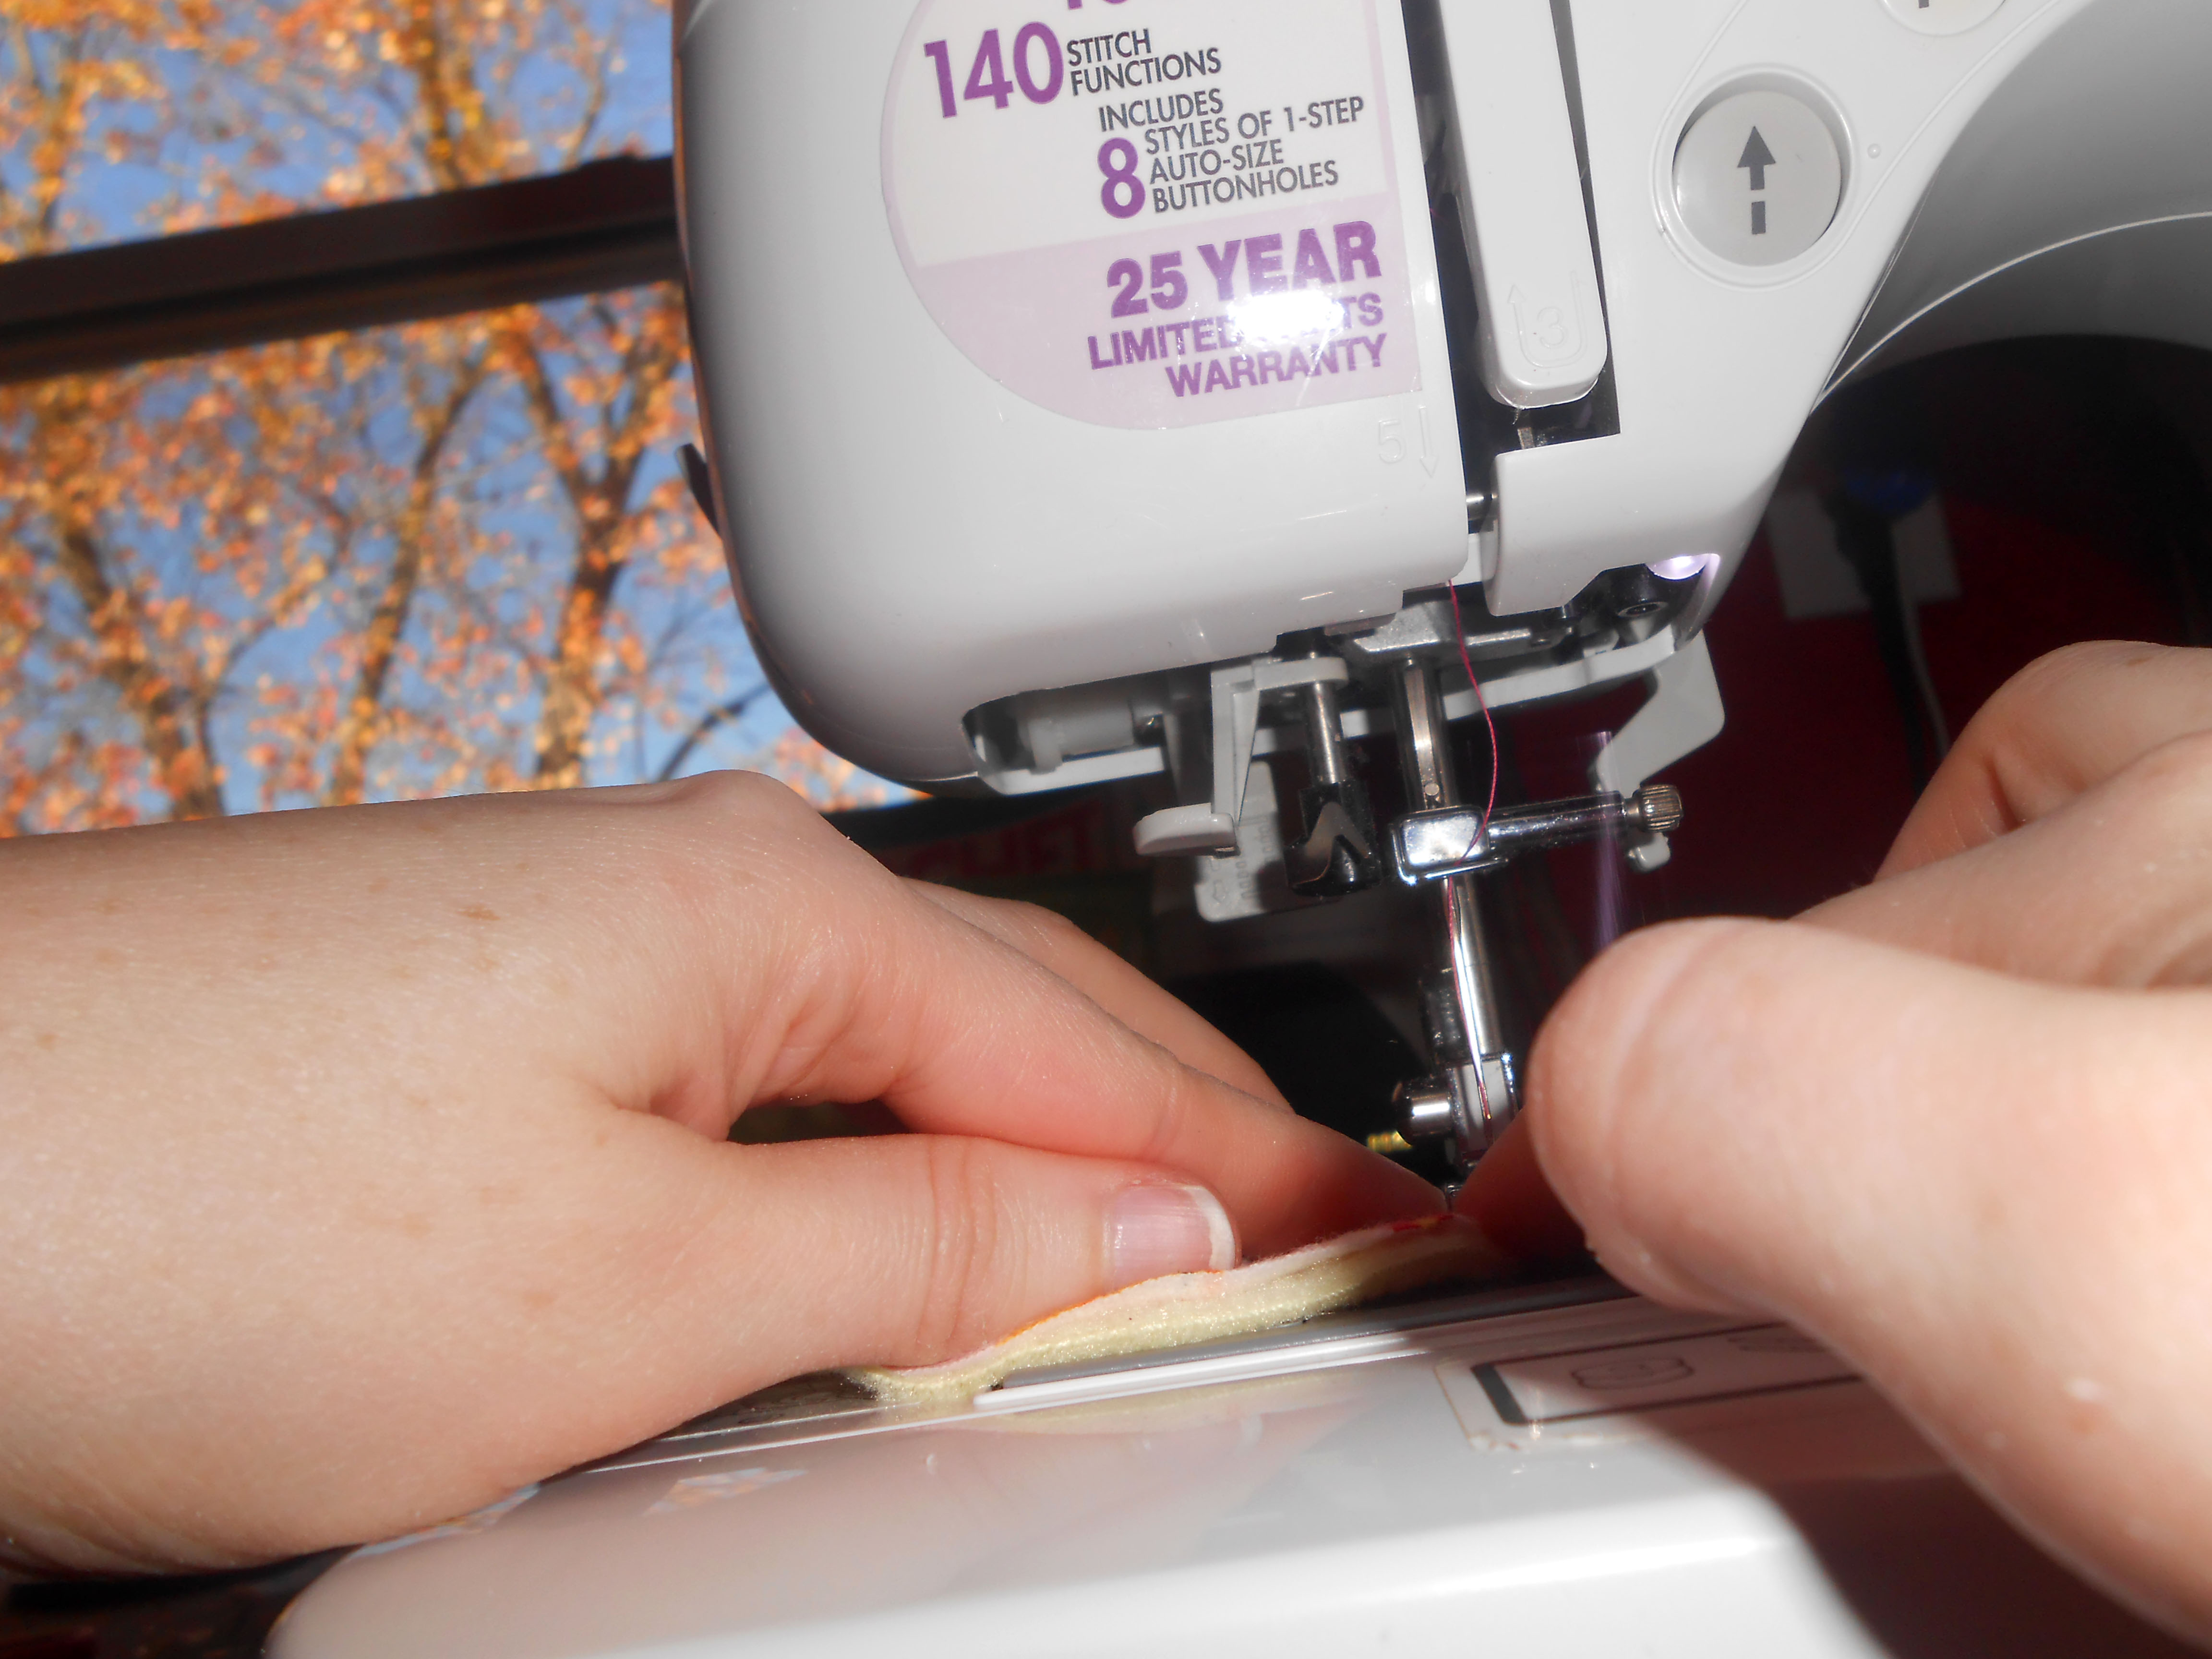
Butt the fabric up to the edge. You can always adjust this as you start to sew. This is where having an overcast foot comes in handy-the little bar on the foot is an easy marker for where you want the edge of your fabric to sit. You want the fabric to sit so that the stitch landing on the left hand side sinks into the fabric and the stitch landing on the right drops just over the fabric.
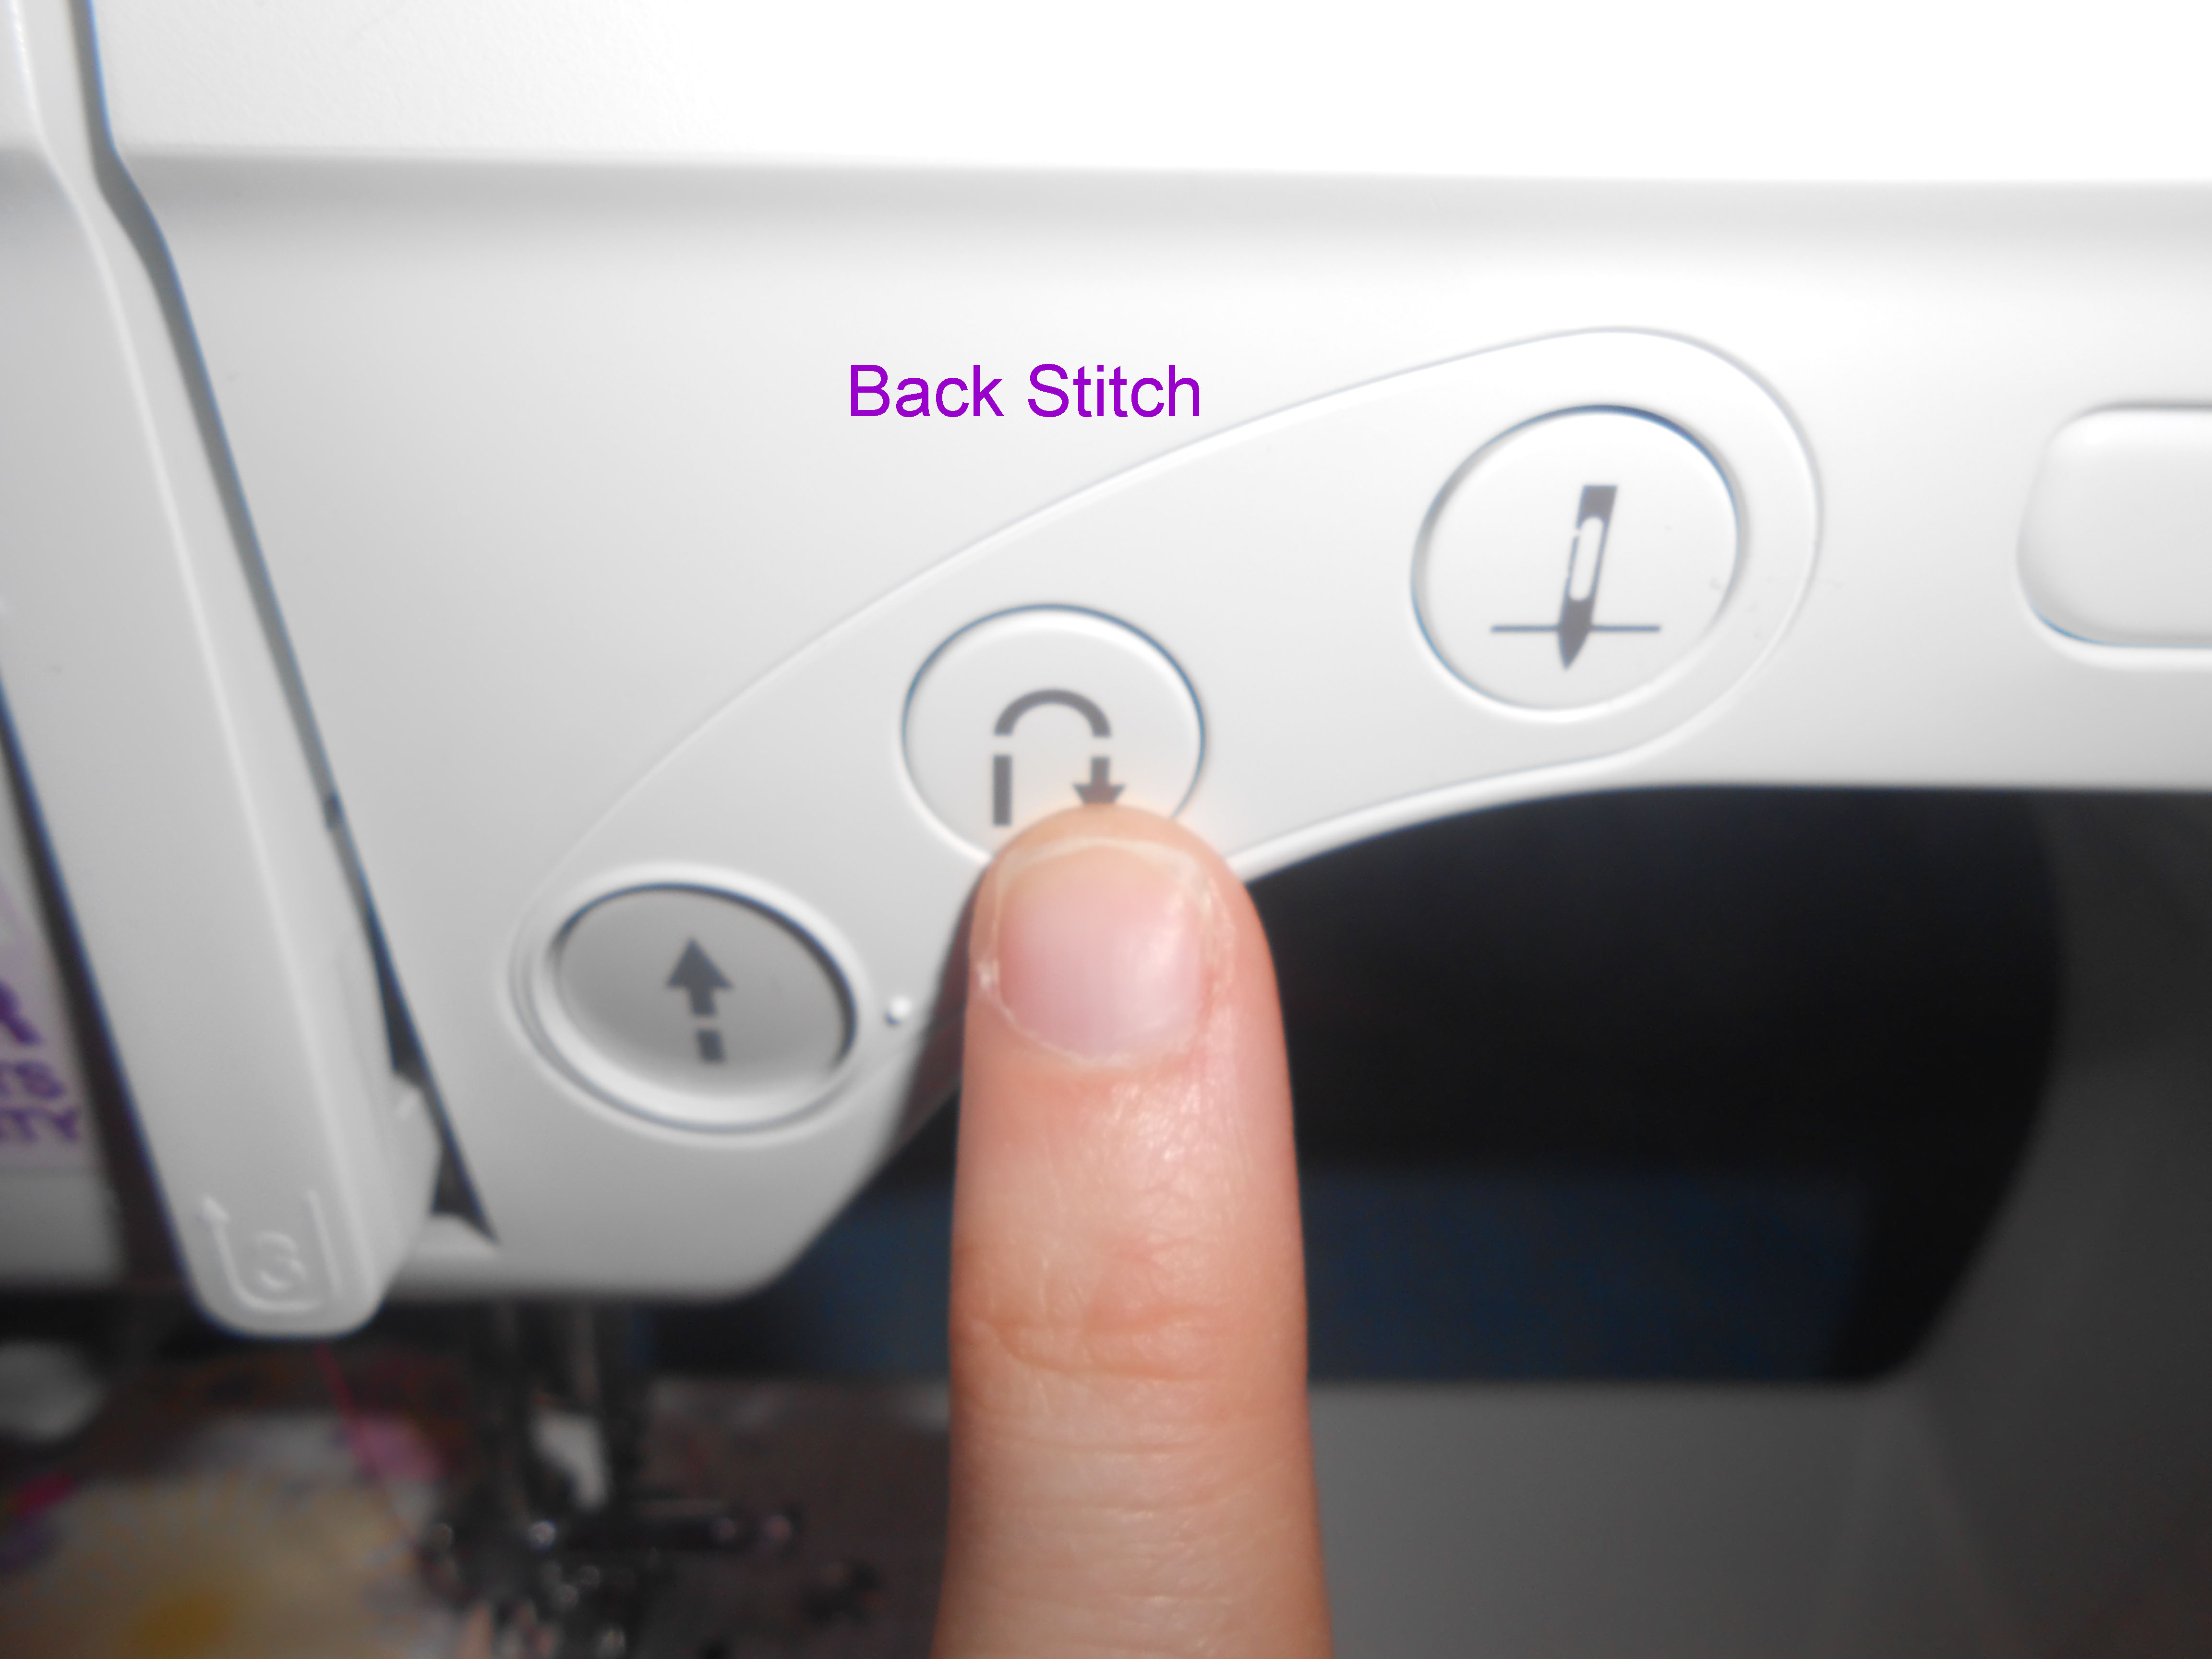
Sink your first stitch or two and then use your back-stitch button. If you’re using a mock serge, you’ll likely just get a reinforcement stitch. With a zig zag, your machine should actually back-stitch.
Start sewing. You can go as slowly as you need to get the hang of going around the curves. Remove pins as you go being careful not to sew over them as they can damage your machine’s needle.

Keep sewing…

As your sewing, stop to make sure your fabric hasn’t shifted and that your stitches are sinking into the back fabric as well. If you’ve missed the back, it’s okay! Just pull your work off the machine, repin, and start again where the fabric slipped.

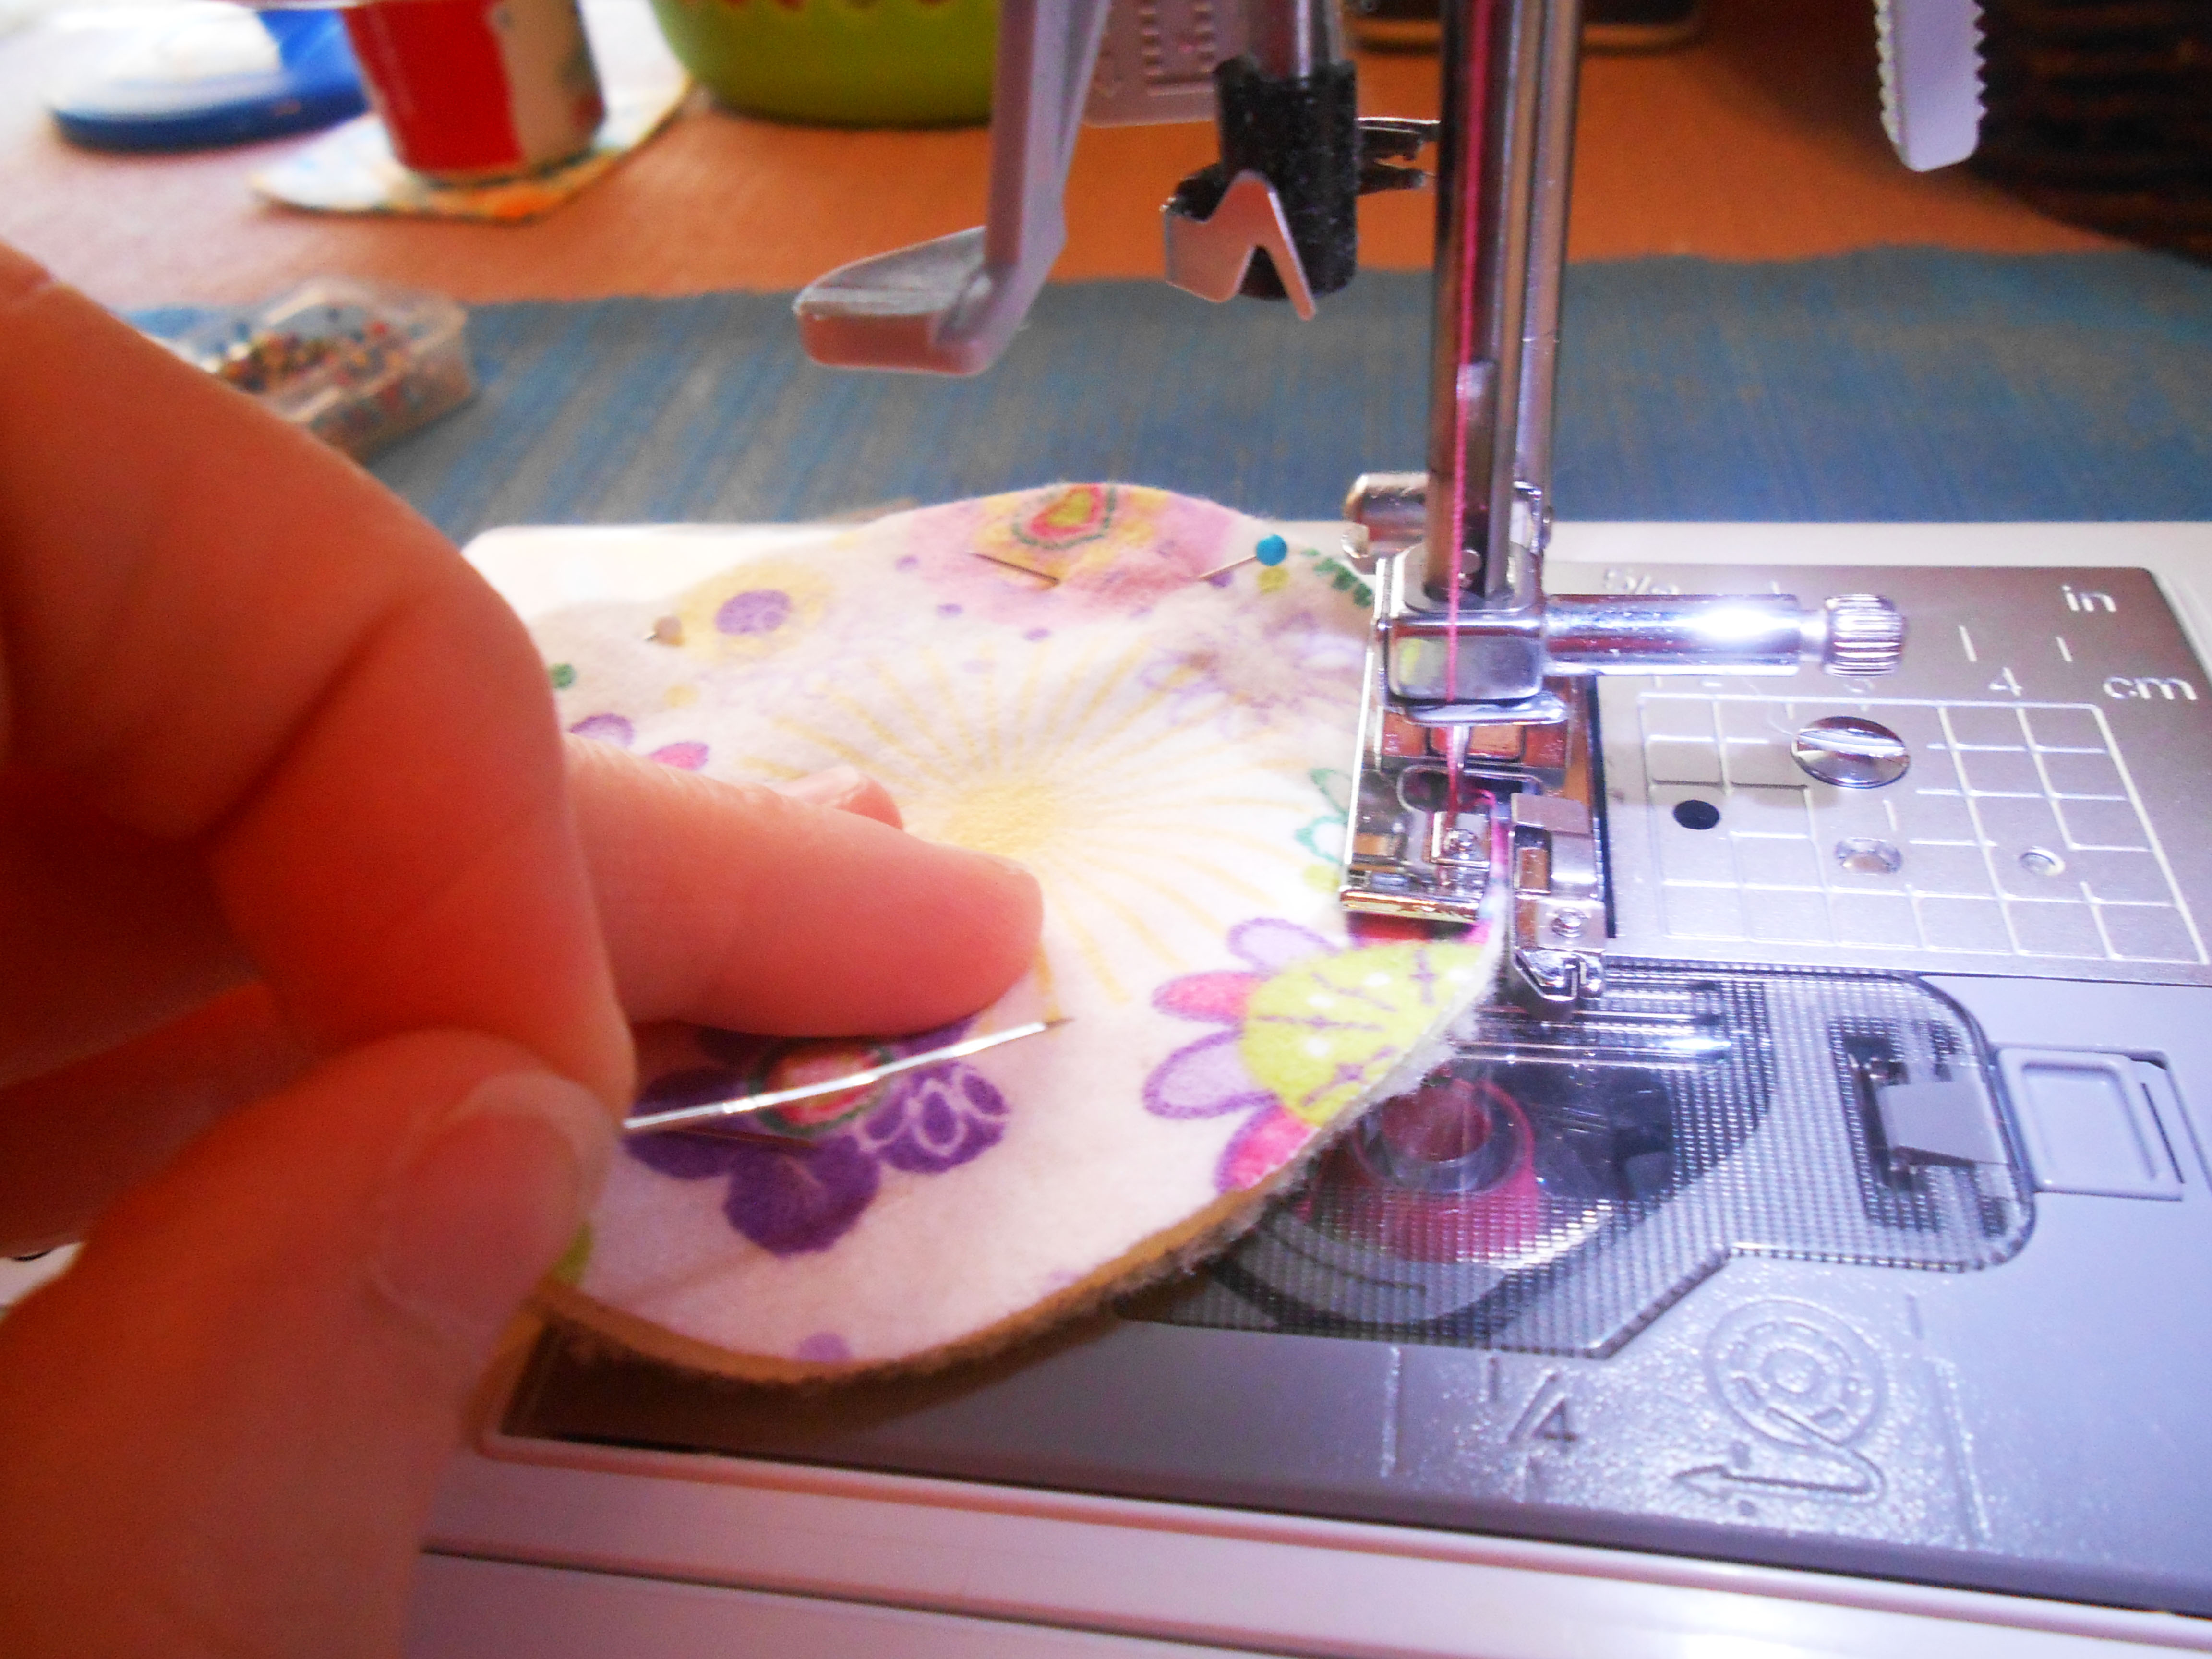
When you’re sewing around and about to reach the beginning stitches, grab your loose threads under your fingers so they stay straight and don’t get tangled in your stitches.

Sew over your beginning stitches for just a bit to help reinforce them.
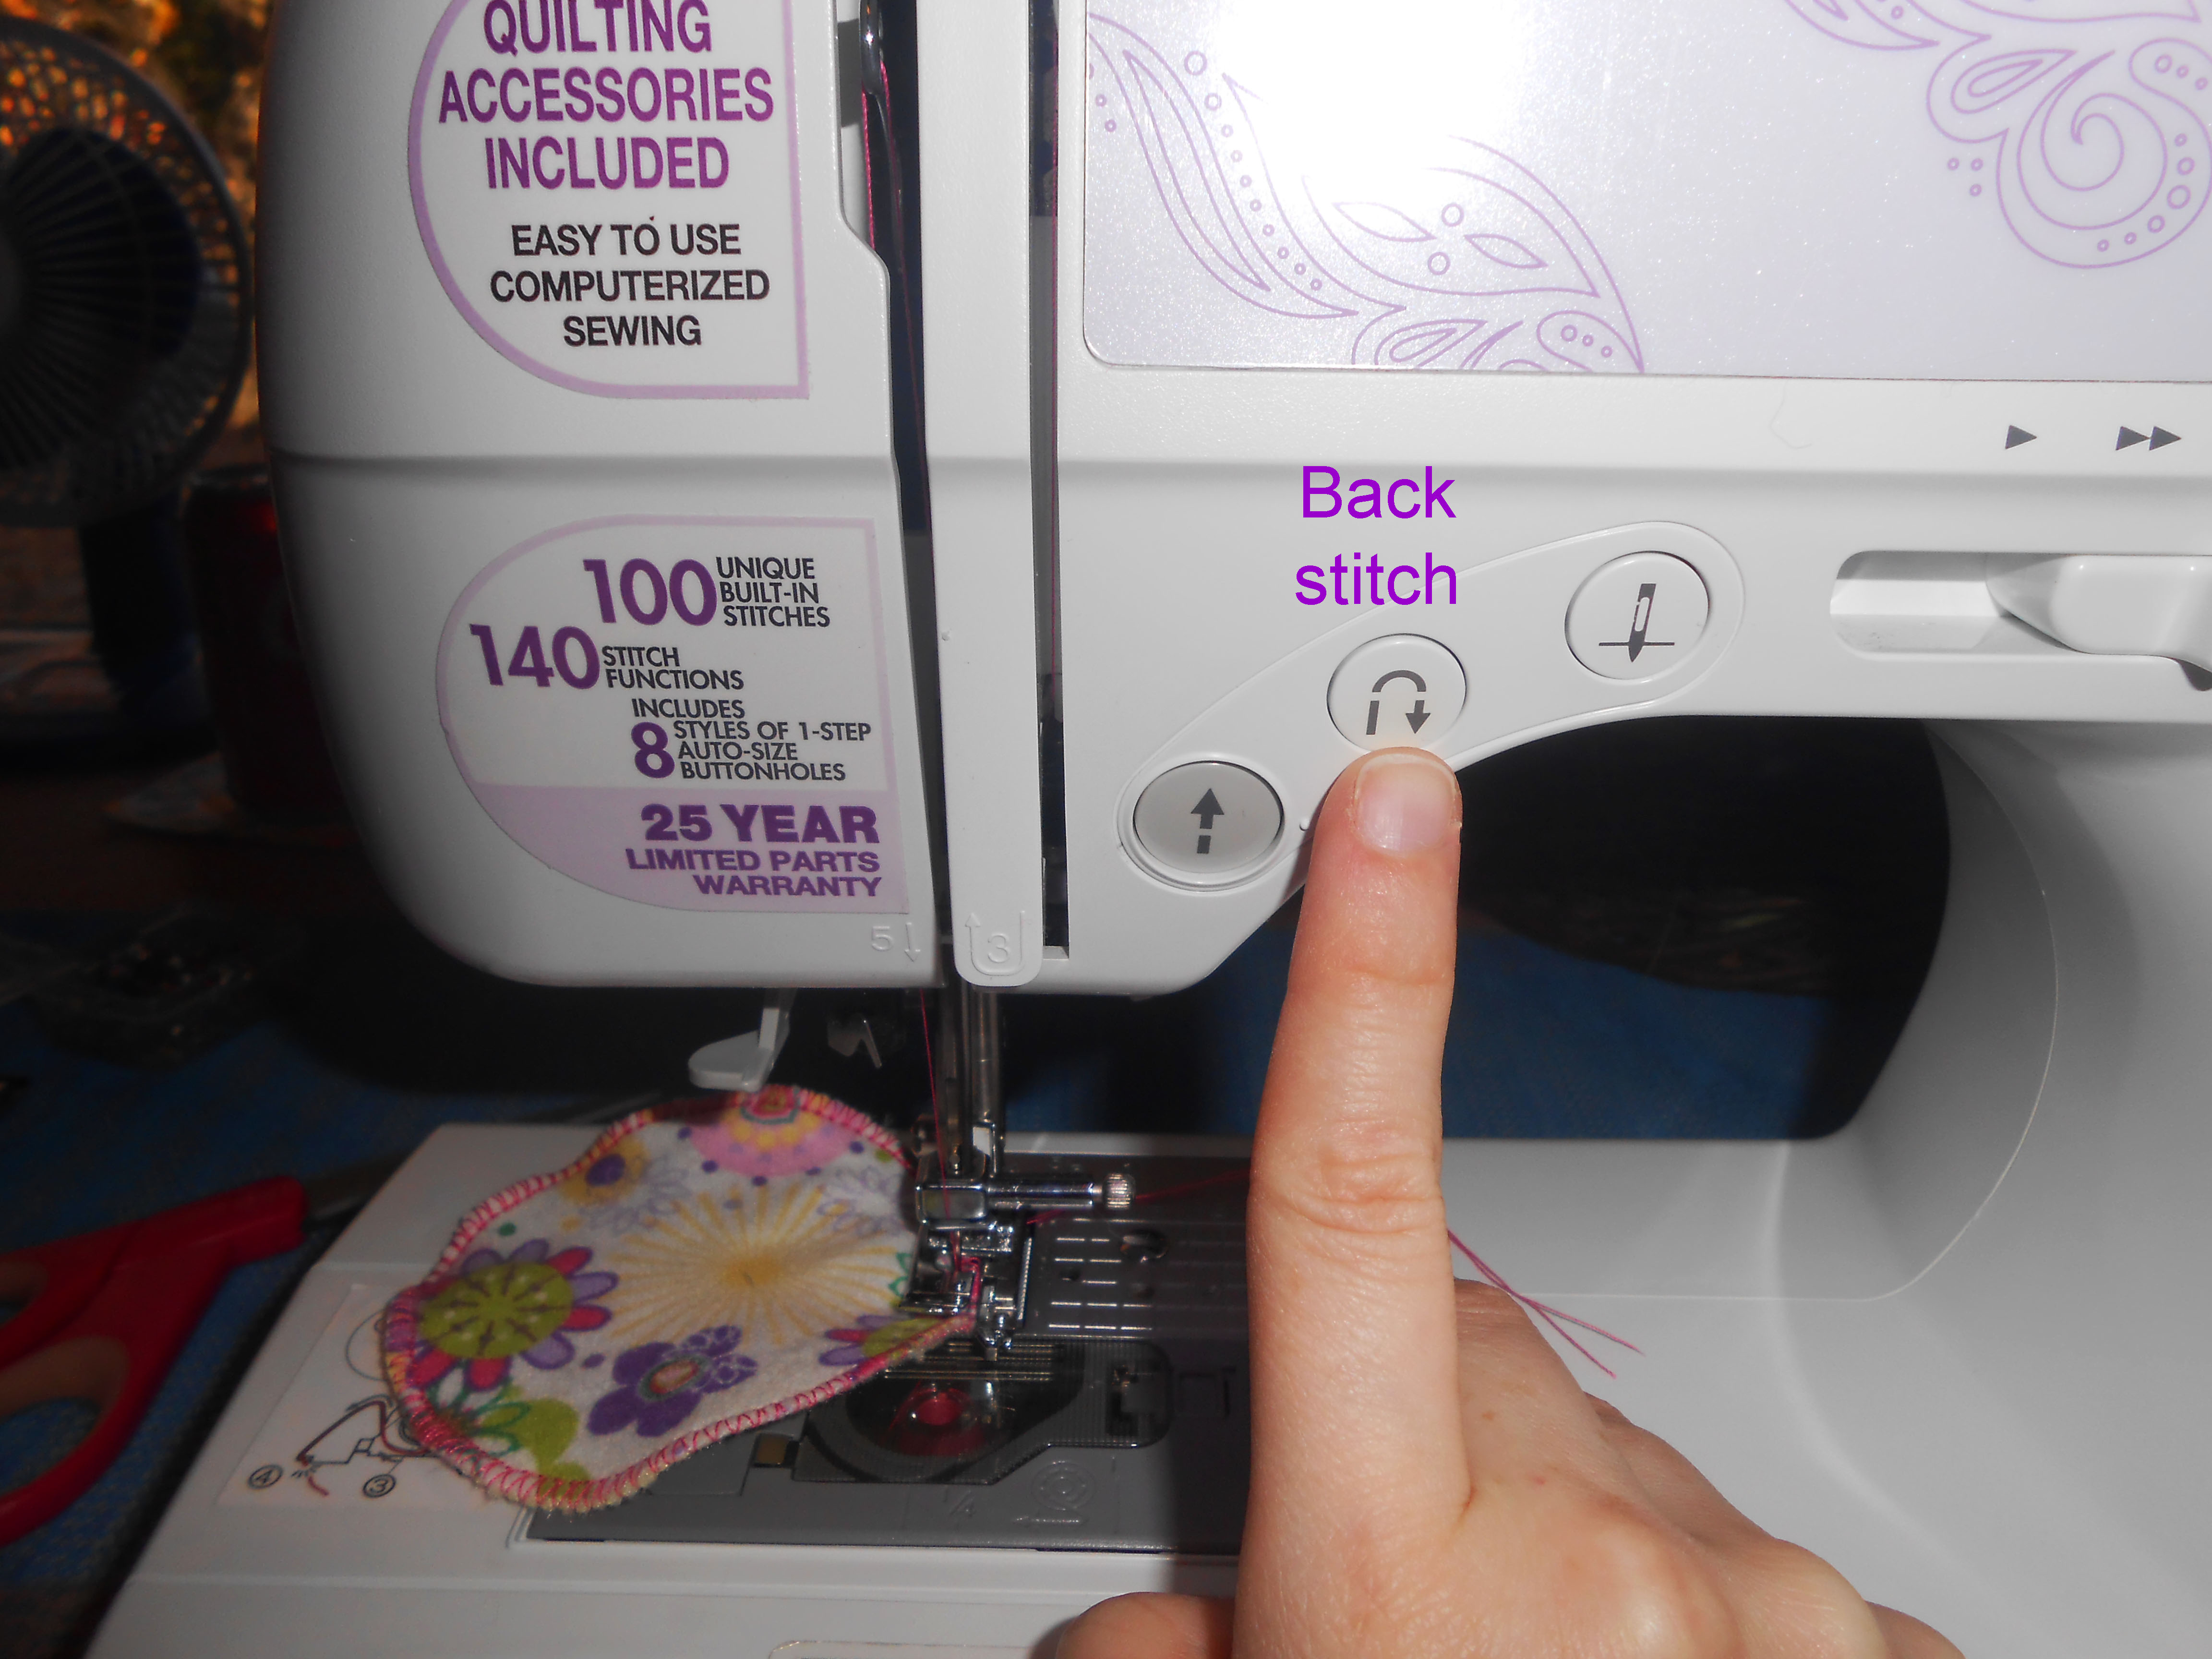
Use your back-stitch button once more.
Lift your presser foot.
If you’re using an overcast foot, gently pull the scrubbie to the back of the machine and then to the side so you can pull your stitches off the overcast bar. Cut your threads.

If you’ve used a regular foot, just pull that baby to the side and cut your threads.

Clip your threads close to the scrubbie, being careful not to clip into your stitches.

Good job! You just finished your first scrubbie.

As nice and neat on the back as on the front.

You can check your stitches to make sure both sides were caught. If they weren’t, run it back through the machine once.
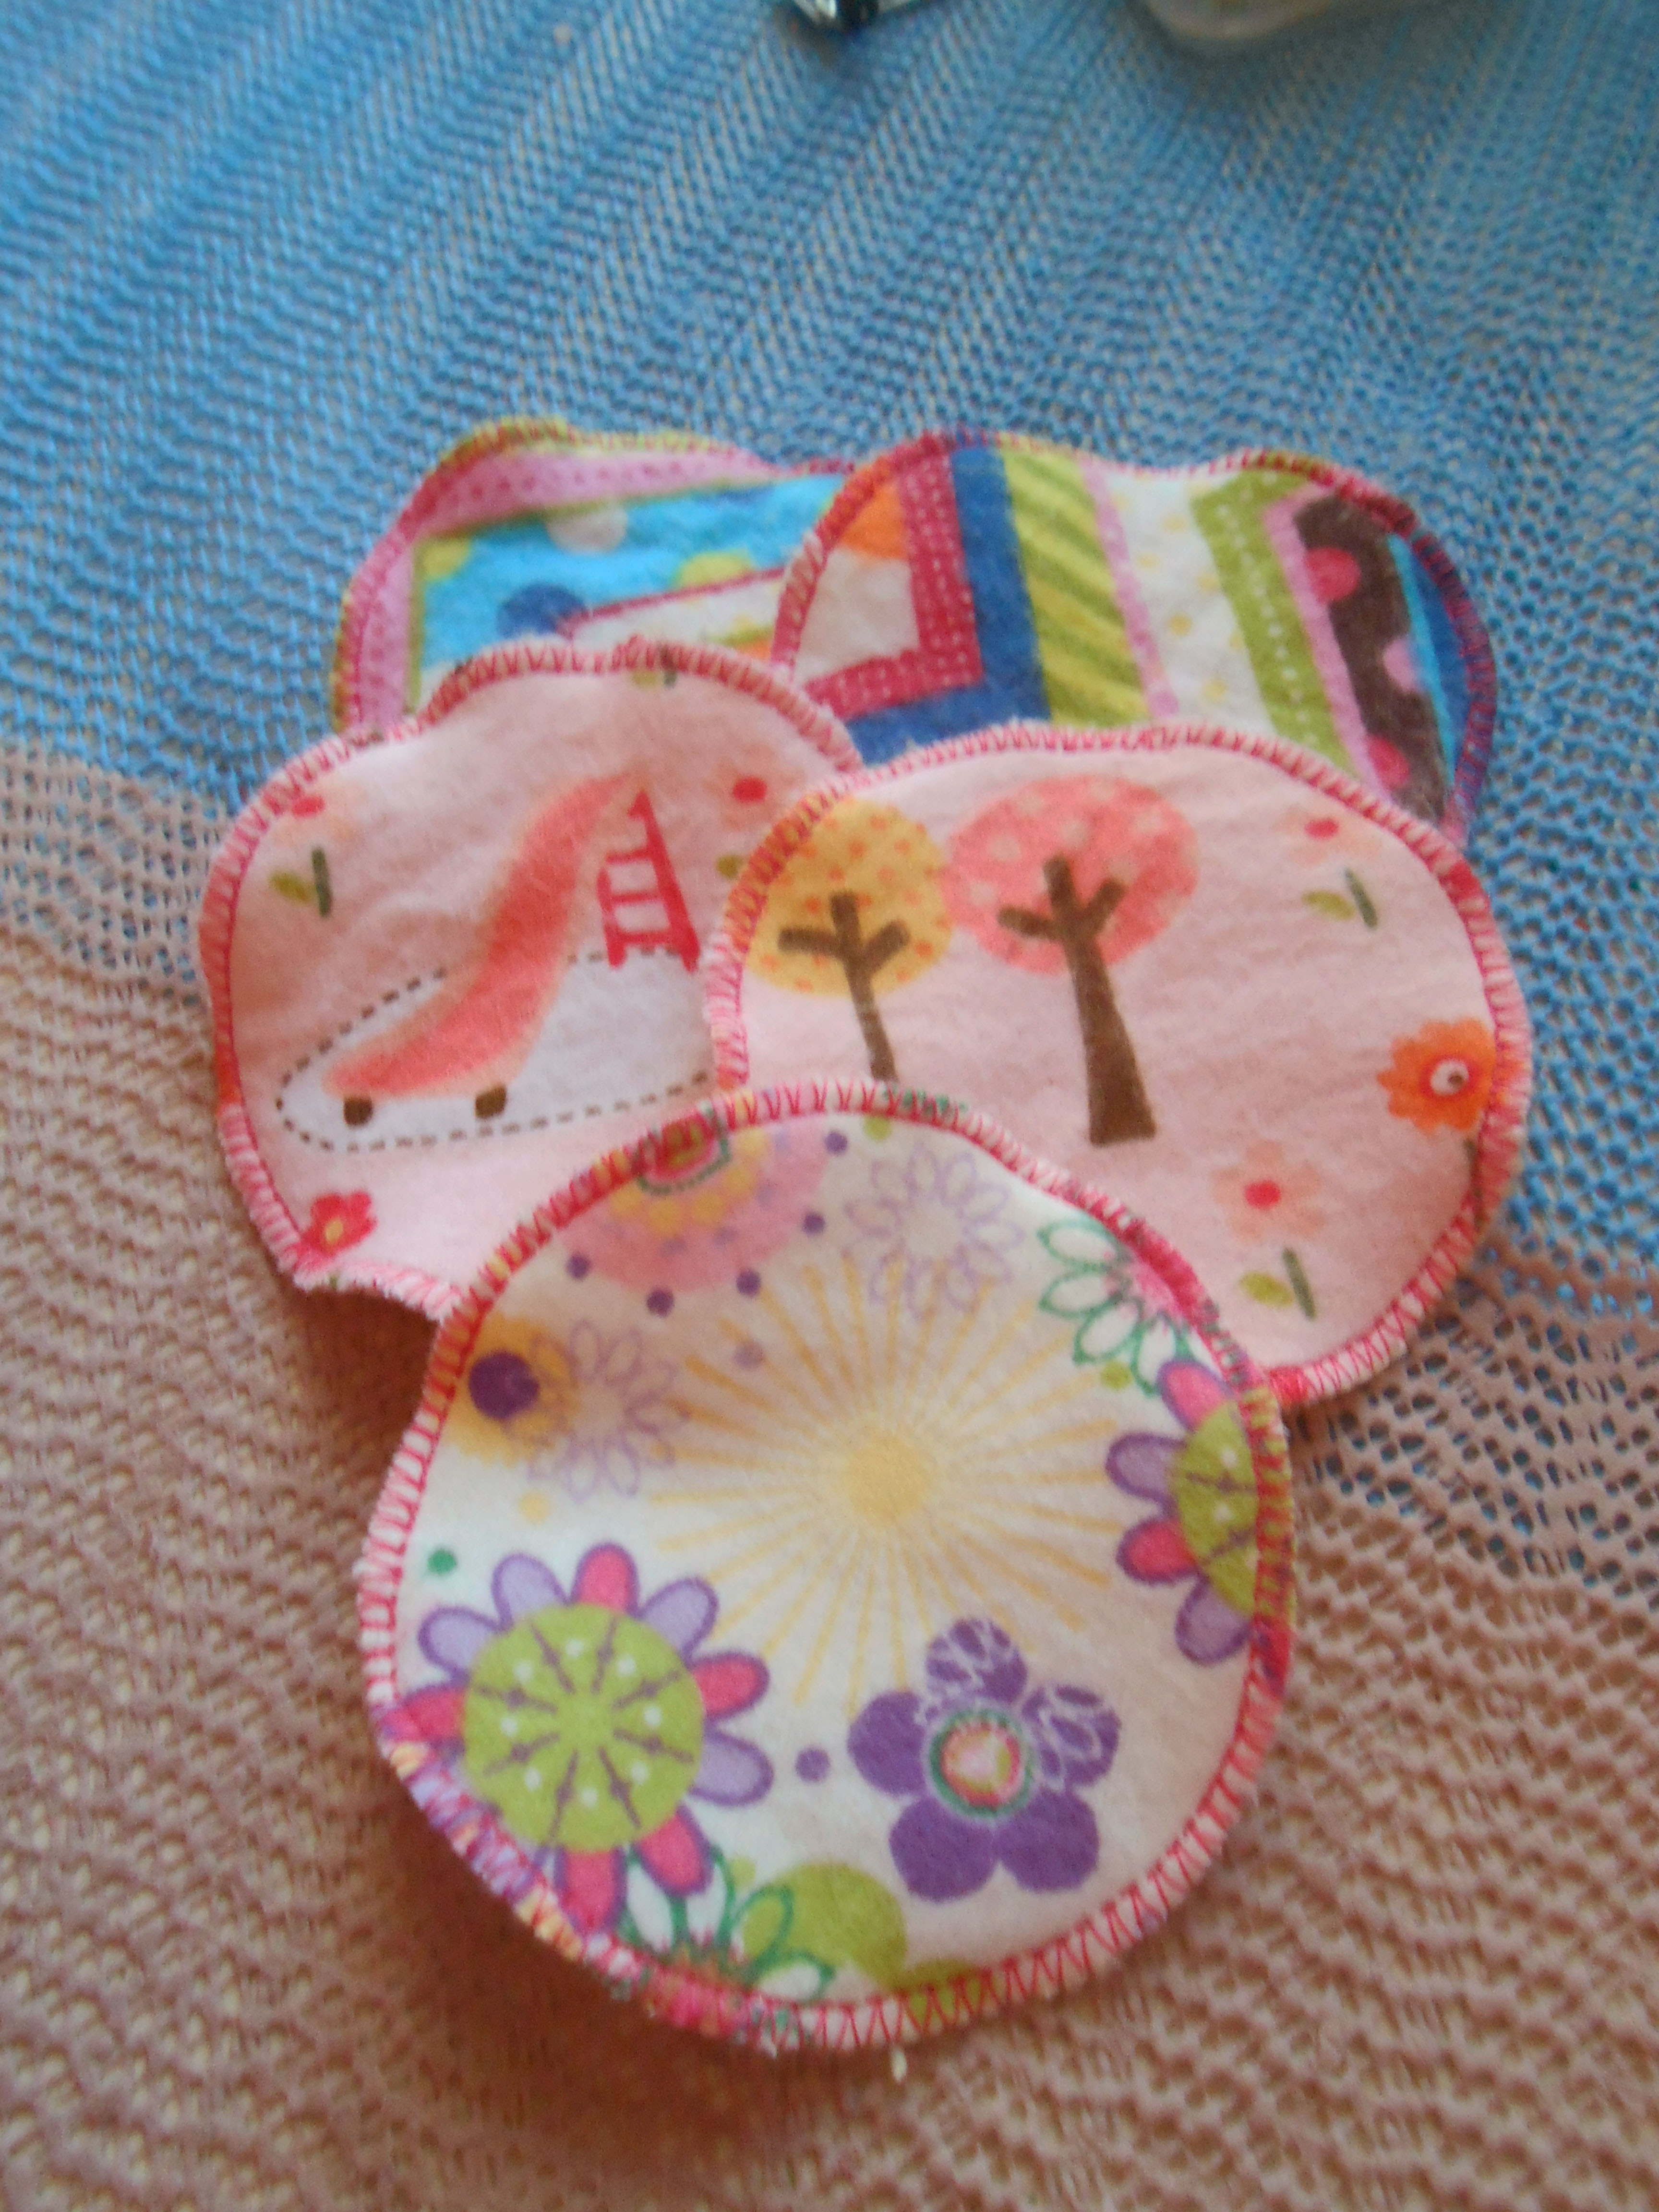
Now, go back through your scraps and make more!
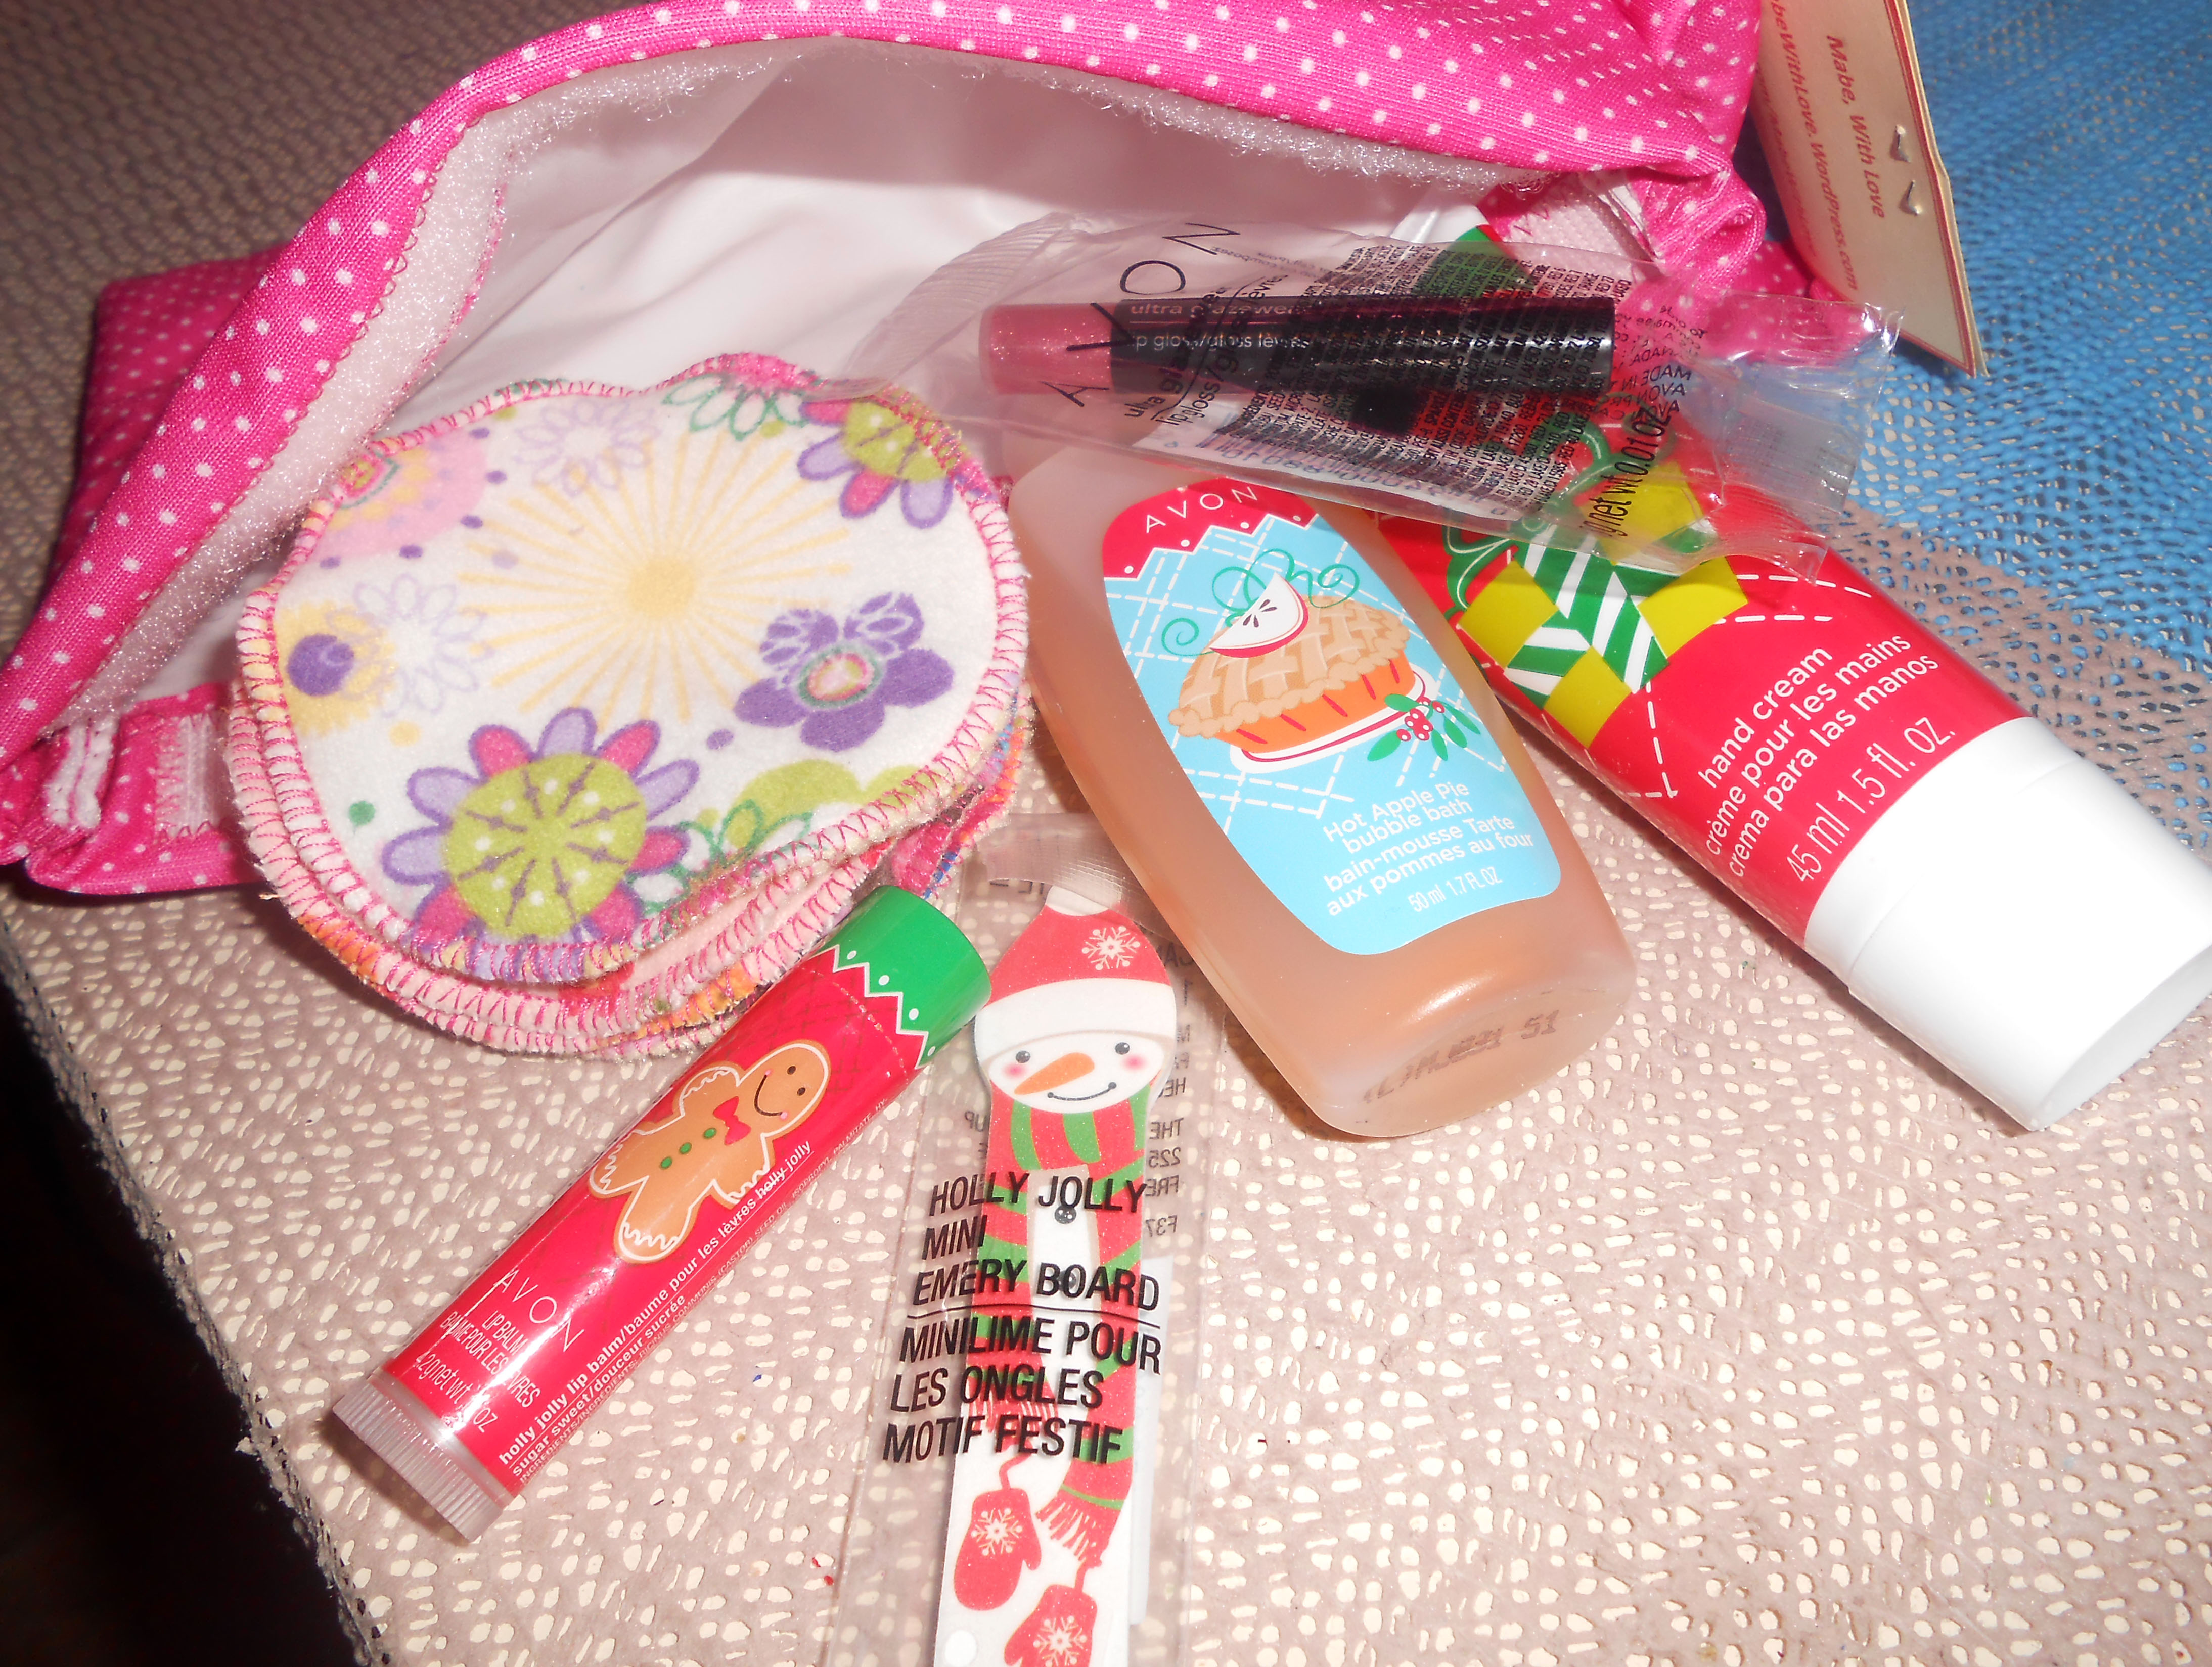
You can even make up several to add to little gift baskets. A pamper me basket or cosmetic bag full of goodies makes for a nice, but inexpensive gift idea.
All those little goodies are from Avon and they are great stocking stuffers.
Ah! I happen to love that fall view outside my sewing desk window.

Pingback: Small Ways to Make a Big Difference – Waste Not | Mabe, With Love
Pingback: Sewing Quick Tip: Presser Foot Spot | Mabe, With Love
Pingback: Cloth Diapering Tips and Tricks | Mabe, With Love
Pingback: SEWING: Reusable cosmetic cotton pads | Rachel Frances Kelly
Pingback: Week 39. Washable Cosmetic Pads – Creative and sustainable living 2015
Pingback: Sustainable Switch: – A Neutral Slate
Pingback: Sustainable Switch – Cotton Rounds – The Neutral Slate
This is fantastic! Thank you for the explicit instructions. I’m just learning to sew and this will be my next project.
LikeLike
Hi! Thank you so much for your tutorial. Right now I use store bought facial wipes for on the go or late at night when I’m too tired to wash my face. Lately I’ve been thinking about finding a more natural alternative. All of my cleaning products, and personal care products are natural and/or homemade by me. I still have a few things I need to transition over, like the face wipes.
Sorry for the long post. Here is my questions, the rounds you made, is it just two pieces of fabric or is there a filling in the middle?
Thank you!
Penny
LikeLike
Hi Penny! I use just two layers. I like fleece for the back because it removes eye makeup very well. On the front I use flannel or quilter’s cotton.
LikeLike
Thank you so much for this! I followed your instructions very carefully and made my first 5 today. 😀 I posted a picture of them on Pinterest. http://pin.it/bf9zdOd
I just learned to sew last week (not joking) and I didn’t even know what an overcast foot was or that my machine came with one. I was very happy to find out I could do the serger stitch with it. Thank you, again!
LikeLike
Yay! I love to hear it when someone learns to sew and it’s a success. Here’s to many more successful projects. 📍✂
LikeLike
Pingback: Zero Waste Checklist ~ Part Three – Bree Town
I really like the idea. I share it in my blog (https://vivercomintencao.wordpress.com/2017/01/01/desafio-1/ ) hope you don’t mind. Have a Happy New Year !!
LikeLike
These look lovely. I’ll be attempting to make these now. Thanks for sharing!
LikeLike
Pingback: Tiny Steps to a More Eco-Friendly Life – Lolly Locket
I had fun making these and using my new Juki sewing machine. I drew multiple circles at once. I used a can of broth as my pattern. Then I sandwiched the cotton layer and two layers of flannel together and pinned the center. After I stitched all the circles on the scrap of fabric I used my pinking shears to carefully cut them out. I also made a net wash bag for the pads. I just washed and dried these and there was no lint accumulation from the raw edges, This is a gift for my daughter. With the exception of one blue flannel fat quarter (on sale) I used scraps for the pads.
LikeLike
Glad you had fun, that’s the best part! And what a lovely gift.
LikeLike
Few people give as detailed instructions with photos as you do. What an inspiration for the beginner! Thank you!
LikeLike
I just followed your instructions to make a small batch of these; thanks so much for posting 🙂
LikeLike
You did a wonderful job giving detailed instruction for the new a Sweeney I have one question can I use cotton batting for inside a blanket to make these or do you think it will be to thick? Also wanting to add a fun print.
LikeLike
You can sandwich a piece of cotton batting in the middle to make them extra plush but it’s not necessary for the scrubbies. One aide with a fun cotton print and one with fleece is my fave combo!
LikeLike
Pingback: GREENER LIVING| make or buy vol. 1 – The Modern Boheme
Noob question, but how do you clean it? As in disinfect clean so the bacteria won’t stay when you use it again? I have a very sensitive skin and I can’t transition because I’m worried I might do it wrong and cause me breakouts and infection. Please help 😦
LikeLike
Hi! I just throw them into a lingerie bag and wash them with my towels. I use a new one each time I wash my face and they just go through the washer and dryer with my laundry.
LikeLike
I do the same thing…I made a laundry bag with a drawstring closure. It hangs on a hook in the bathroom. When I am down to one or two clean pads I put the laundry bag with my dirty pads in a wash and dry cycle. They are stained but clean.
LikeLike
Pingback: DIY List to be Green – Green Living in a Farmhouse World
Pingback: SEWING PROJECTS FOR A ZERO-WASTE LIFE | Sewing vs waste in the bathroom – SEWRENDIPITY
Pingback: Reducing Waste Room by Room: Bathroom – Zero to Hero
hi wondering if you would allow me to share your excellent tutorial on my page
LikeLike
Please do! We just ask that you link back to our original post here when sharing. Happy sewing!
LikeLike
Just made a set of these! I sew all the time, therefore I have a lot of scraps! Made mine out of two layers of flannel with terry cloth in the middle! Great for removing the makeup!
LikeLike
Pingback: Single-Use Product Swaps – Adventures in Becoming Jade
Best tutorial on Pinterest ever! Thank you for a photo at every stage. I learned more about my sewing machine in this tutorial than any other that was a bonus.
LikeLike
Thank you! This was super helpful for a newbie like me, I really loved that you took a picture of the setting on your sewing machine used as I needed that!
LikeLike
Very cool tutorial. I tried it out and am so thankful that I never have to buy cotton rounds ever again! Thank you!!!!
LikeLike